marcm09
100+
Audio Monster
Posts: 119
|
Post by marcm09 on Jun 16, 2007 14:11:32 GMT
It was a whole 12 Months ago that I performed my Xcan V2 upgrade. It consisted of Bigger Panasonic FC's power supply caps, New Non-polarised ones, Polysteter Bypassed input and output caps with a 2nd small value polystyrene bypass cap, New custom built power supply, a blue LEd, Heatsinked Transistors, A Drilled Upper circuit board to aid cooling and a pair of russian Reflector Valves. I have been very very happy with the amplifier and didnt really see any reason to perform those few last changes that are also included on this site. I'm (as many of you know and have been helping with suggestions) in the middle of transforming a MF XA100R amplifer, while I was in the middle of ordering various components, I though what the hell, I might as well get those few last things for the Xcan. So they arrived and I have just installed them.... First I changed the Diodes to the ultraFast UF4007 and fitted the 3k Snub caps to them. Secondly I took out the NP input caps that I had previously installed and thirdly I installed a genuine 10K Alps pot ! Oh and I found a matching knob that looks just like my XA100r knobs only smaller ! Also note the hot glue between the Power caps on the top board, this mod seemed to provide a little me with a tighter bass ! Upon listening I noticed an improved amout of detail in the music, but something waqs just not right, the amp sounded a little brittle and harsh to say the least ! So apart it came angin and I changed the input caps back to the Np's bypassed with a polyster and a polystyrene caps. (When I measured my CD players output on pause it measured 2Ma and the acceptable limit is around 50. But when the Cd was palyer it was reading in the 200's) The amplifer is now stunning and I am very Happy, here are some photos.... 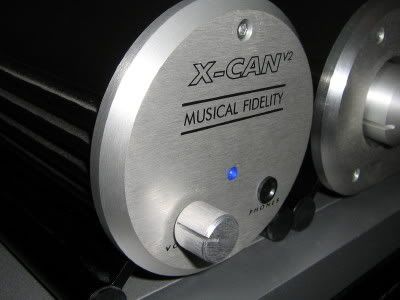 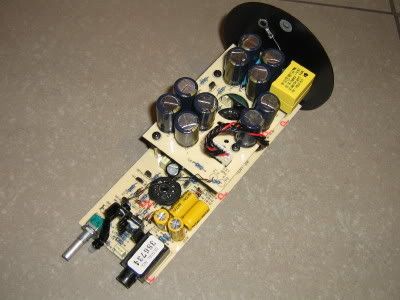 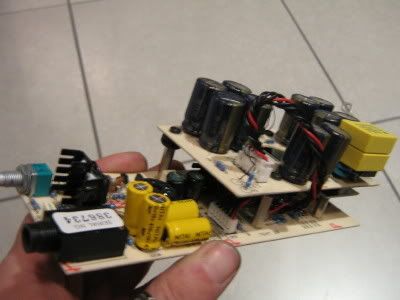 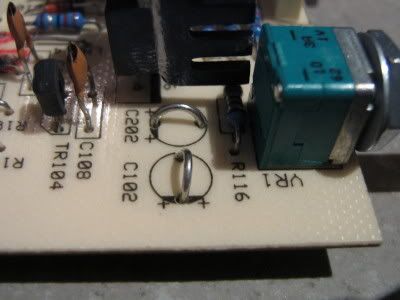 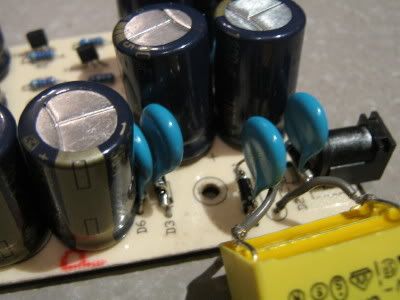 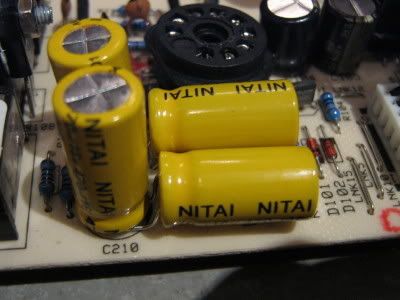 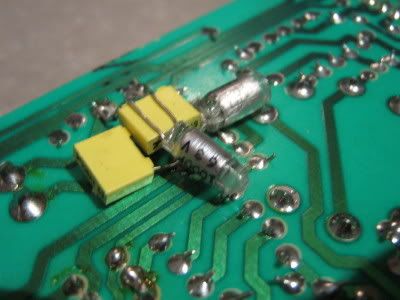 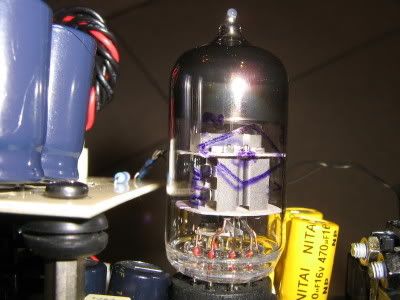 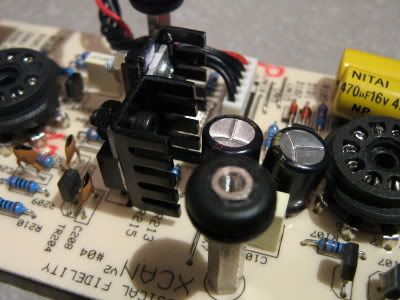 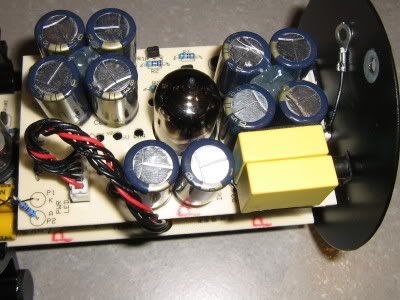 |
|
|
|
Post by PinkFloyd on Jun 16, 2007 18:39:31 GMT
Hi Marc, Lovely work there! It really is a nice unit to work on and very responsive to tweaks.... are those two x2 suppression caps you've got on board? (the yellow ones) All you need now is a Jalco headphone socket to really tart the front panel up: 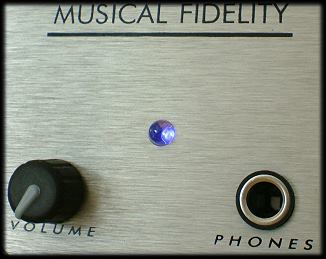 The chrome ring really does improve the appearance and the Jalco is a lot smoother than the stock MF one  I'm off out right now to fit some chassis mount RCA sockets onto mine see how it goes................ |
|
|
|
Post by bennyboy on Jun 16, 2007 18:48:57 GMT
Nice to see your sticking with what works! I'm sick of reading about how great an amp is, only to see the same fool talking up a different amp a week later. A big reason I cut way back on my HeadFi viewing was because of all the folks with to many dollars and no cents(sense).  |
|
|
|
Post by PinkFloyd on Jun 16, 2007 22:38:05 GMT
Nice to see your sticking with what works! I'm sick of reading about how great an amp is, only to see the same fool talking up a different amp a week later. A big reason I cut way back on my HeadFi viewing was because of all the folks with to many dollars and no cents(sense).  You're not wrong there benny! There are a lot of penny wise pound foolish people going about chopping and changing on an almost bi weekly basis... Do you remember lou on head-Fi? Christ he must have bought every amp / headphone on the planet by now.... never satisfied. Good on you Marc, it sure is nice to see someone making the best of what they have already got to hand. I'm back in from the workshop and am having a listen to my (dogeared) v2 with a couple of 100nF class x2 suppression caps, a 470nF polypropylene, a 220nF polyester and a 1N LCR polyprop (all in parallel) in situ..... no real reason for this I just thought I'd spend half an hour messing about...... doesn't sound any worse, will see how it sounds after 24 hours. This v2 has had more cap swaps than I've had hot dinners... "pads"? what are they? Long gone! this guy is more p2p now.... I love her though, been with me for years and she's tuned like a fine instrument... I've tried everything in her but usually end up going back to less is more (or as Rick would say KISS... keep it simple stupid) I doubt this will stay in for long but you never know;) 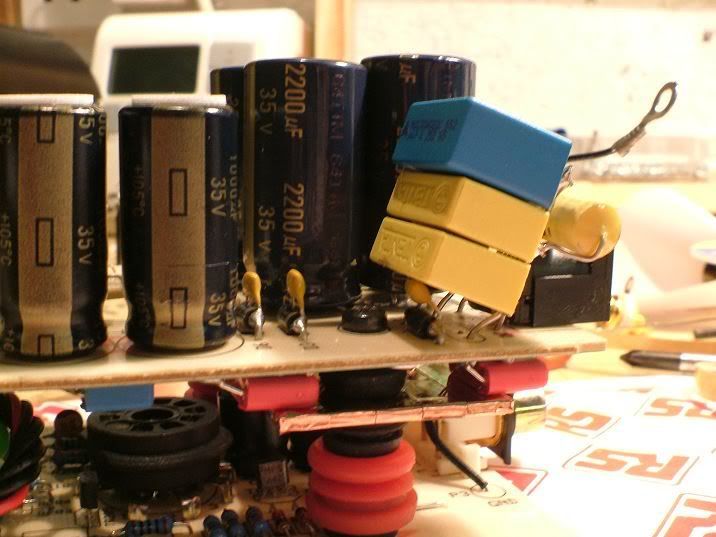 Lead inductance and what have you are always at the back of the mind and even though these "stacks" can sound bloody good you end up convincing yourself that they "can't possibly" sound good in theory. I'm in that kind of mood at the moment (zany) and may well fire in a few of my totally "wrong" (if you believe in theory) 2200uF soopacaps tomorrow..... I made a load of these up a couple of years ago on a rainy day when I was well and truly bored out of my skull: 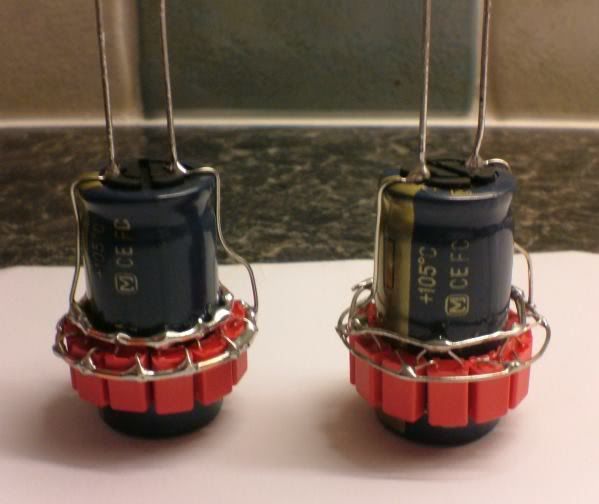 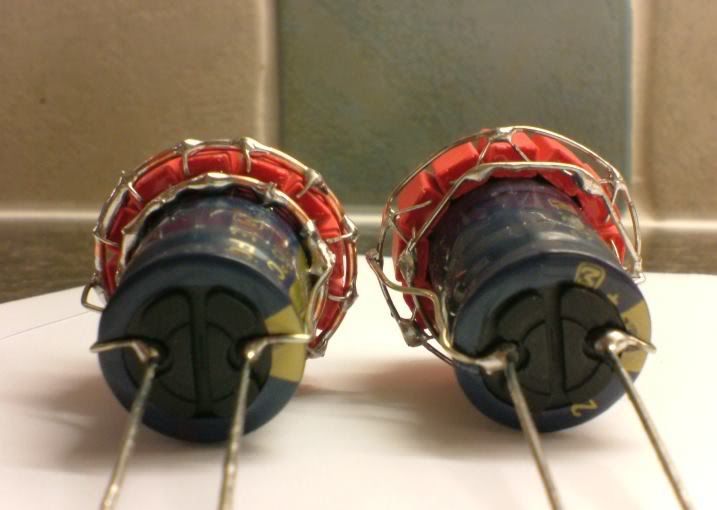 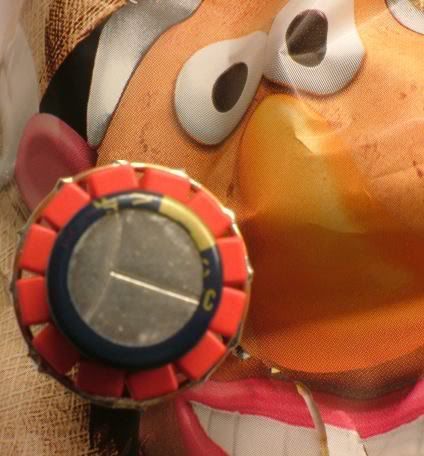 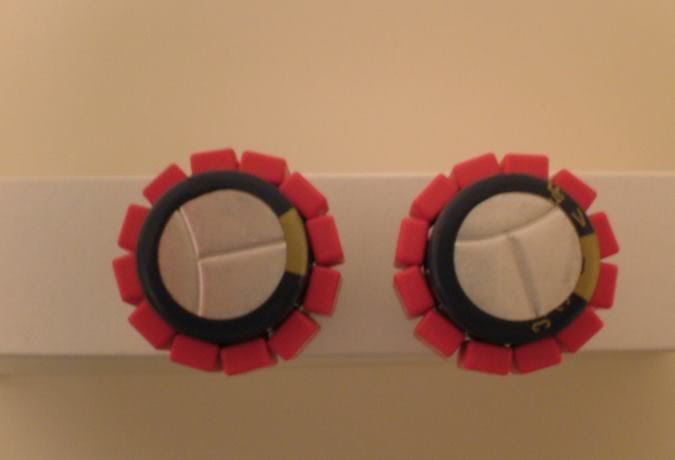 Totally "wrong" but fuuuuun ! Must give them a whirl, they've been kicking around so long I now refer to them as NOS supacaps  Another thing you may want to try Marc..... get the aluminium shield off the amp and cover it with sticky backed copper tape  If you've got ears like a bat you may well hear a marked improvement running copper. (I've got rolls of the stuff if you need some PM me.) |
|
marcm09
100+
Audio Monster
Posts: 119
|
Post by marcm09 on Jun 16, 2007 22:40:08 GMT
Mike - Yes they are X2 suppression caps and work a treat, to get these two in there I has to bend those bigger Diode Snubs that I got for the XA100 flat then sit them above, its a tight fit when you slide the board back into the enclosure.
I would love a Jalco Headphone Socket, But I cant seem to find amy in nz ? Maybe I can send you something that you want from New Zealand - if you send me a socket (Don't mind paying its just that for the amount they are worth its hardly worth organising currency transfer etc!)... Just a though !
|
|
|
|
Post by PinkFloyd on Jun 16, 2007 23:01:42 GMT
Mike - Yes they are X2 suppression caps and work a treat, to get these two in there I has to bend those bigger Diode Snubs that I got for the XA100 flat then sit them above, its a tight fit when you slide the board back into the enclosure. Fit the diodes on the underside of the board (and any other low mount componets) you'll have a lot more room to work in the area. I was going to fit a 400V 10uF film cap there but not enough room .... if only there were a bit more space! I'll send you one over free of charge and I don't want anything in return, PM me with your details and I'll get one over to you. Mike. |
|
|
|
Post by PinkFloyd on Jun 16, 2007 23:04:05 GMT
|
|
marcm09
100+
Audio Monster
Posts: 119
|
Post by marcm09 on Jun 17, 2007 4:06:07 GMT
Thankyou mike- you have a PM
|
|
marcm09
100+
Audio Monster
Posts: 119
|
Post by marcm09 on Jun 24, 2007 7:16:29 GMT
Further post - My Rock Grotto modified Xcan v2 is simply stunning  It has to be my favorite piece of Audio equipment, If you do not have a v2 or v3 and a quality set of headphones I urge you to grab a pair and perform these mods or have mike do them for you.... Its pure bliss .... You could spend thousands on a quality amplifier and a pair of speakers only to come second best to the sound from a rock grotto xcan and a pair of good cans !!! It has to be my favorite piece of Audio equipment, If you do not have a v2 or v3 and a quality set of headphones I urge you to grab a pair and perform these mods or have mike do them for you.... Its pure bliss .... You could spend thousands on a quality amplifier and a pair of speakers only to come second best to the sound from a rock grotto xcan and a pair of good cans !!!  The best audio that I've ever heard - period The best audio that I've ever heard - period
|
|
|
|
Post by PinkFloyd on Jun 24, 2007 21:59:37 GMT
Cheers Mark, Glad you like them  Enjoy the music mate. Mike. PS: Has your headphone socket turned up yet? |
|
marcm09
100+
Audio Monster
Posts: 119
|
Post by marcm09 on Jun 26, 2007 10:13:50 GMT
mike didnt notice the P.s at the bottom and checked it quickly as I was at work, have already sent you a PM, thankyou again !  |
|
|
|
Post by PinkFloyd on Jun 26, 2007 21:34:36 GMT
Something I tried today Marc.... cheap and cheerful but ups the overall clarity ever so slightly..... the track from the input caps to the potentiometer, bypass them with some twisted CAT5 wire.... I'll upload pics tomorrow when there's good light  |
|
FauDrei
Been here a while! 
Posts: 489
|
Post by FauDrei on Jul 16, 2007 20:35:44 GMT
Mike, you really should stop giving me more ideas  Almost a month ago I've read your "CAT5" mod and it had just been growing in the background of my head... until this evening. This evening I've decided not to wait for the pictures and give it a shot on my own... An hour ago I took a cca. 10 cm piece of shielded CAT5, split the pairs on both ends, presoldered green&blue as left, white-green&white-blue as "left ground", orange&brown as right, white-orange&white-brown as "right ground" on both sides... desoldered the ferrite bead bypasses of (long ago removed) input caps and soldered this piece of CAT5 directly to the pins of Alps pot (yes - this was damn good opportunity to swap the potentiometer too)... on other side I soldered the ends near quad I/O connector to appropriate ends of resistors in signal path, just after the 220 pF ceramic caps (swapped them with polystyrene equivalents) for left&right channels and two nearby resistors for "left ground" and "right ground". Checked (ohmmeter) for shorts and turned it on... Although I have two elephant legs instead of hands it seems that I've managed to solder properly the even the tiny pot pins - V2 is working. Inside it does not look nice though, not to mention that I now need new, bigger knob to fit the new Alps sticking out... And, after first hour of listening, It seems more detailed/clearer too (too soon for proper evaluation). So, Mike, please do not say that you had something different in mind  Regards, V3 |
|
|
|
Post by PinkFloyd on Jul 16, 2007 21:46:01 GMT
Sounds about right FauDrei  the fact it's working says you've hooked it up correctly and, yes, I found it slightly helped the overall coherence (not dramatically but every little bit helps make the overall picture clearer) As to the pot shaft you will have to trim it. Best way to do this is fit a cutting disc on the end of a dremel (or similar tool) Grab the pot shaft with a pair of long nose pliers with your left hand to prevent the shaft rotating and cut 10mm (or thereabouts) off with the cutting disc (on full rpm) wear safety goggles I've had quite a few cutting discs breaking up in use and not good if they fly into your eye at a rate of knots  Don't bear down on the shaft, let the cutting disc do the work..... your knob will now fit perfectly  I've got a v2 here at the moment in for mods, I'll go the extra mile with it and perform the cat5 tweak...pics will be uploaded, nothing exciting just a twisted pair of wires replacing the tracks.... we obviously have to draw a line somewhere.... sure it would be a good idea to replace all the metal film resistors with 15PPM 0.1% RC55Y, house the v2 in a bigger enclosure and fit obscene amounts of extra capacitance, replace all film caps with polyprops, cover it in gold leaf, blah blah blah......... but probably best to do as much as we can to improve it without totally bastardising it and turning it into a monster that in no way resembles an X-Can v2. The beauty of this amp is the design, some think it's horrible looking whilst others appreciate it's unique, imaginary, innovative form.... I am firmly in "team appreciative" and love this guy just as much as Miguel appreciates and loves his Volkswagen Beetle... it's most certainly now a classic and will remain so thanks to it's individuality..... you must remember this was one of the very first dedicated headphone amps to hit the market back in the day and at £129 rrp it was also in reach of the average man. I just loved it the minute I set eyes on it , a "headphone amp in a can" I still love it to this day and that (IMO) is a sign of a true design classic..... it's timeless. Would be criminal to extend the mods to "out of the box" status... best to get the best we can from within the confines of the box  There's always a comprimise but I think we've addressed / improved 70% of the internals without resorting to total bastardisation of a listed buliding / classic design. |
|
FauDrei
Been here a while! 
Posts: 489
|
Post by FauDrei on Jul 17, 2007 23:01:42 GMT
The beauty of this amp is the design, some think it's horrible looking whilst others appreciate it's unique, imaginary, innovative form.... I am firmly in "team appreciative" and love this guy just as much as Miguel appreciates and loves his Volkswagen Beetle... it's most certainly now a classic and will remain so thanks to it's individuality..... you must remember this was one of the very first dedicated headphone amps to hit the market back in the day and at £129 rrp it was also in reach of the average man. I just loved it the minute I set eyes on it , a "headphone amp in a can" I still love it to this day and that (IMO) is a sign of a true design classic..... it's timeless. Would be criminal to extend the mods to "out of the box" status... best to get the best we can from within the confines of the box  There's always a comprimise but I think we've addressed / improved 70% of the internals without resorting to total bastardisation of a listed buliding / classic design. Totally agree with you on that. Have had similar experience with my V2 from the very start, and recently, thanks to your effort and this site of yours, I like it even more... BTW, don't know whether Alps pot is that much superior to stock potentiometer or this CAT5 trick with "separated grounds" did the trick, but I DO hear improvement, and in my case it is not even that subtle. After roughly 24 hours of burn-in I can already confirm that I hear through my "standard" HD600 better instrument separation and positioning. Not that there is dramatically more sound information/details (V2+HD600 had plenty of that even before), but now you can determine them more easily and effortlessly - you just hear them, not that you have to listen (and seek) for them. They are simply there around you. Again - don't know whether it is up to potentiometer change or the CAT5 cable ...or the combination of those two, but definitely an upgrade. Another good idea Mike. Thanks. |
|


 It has to be my favorite piece of Audio equipment, If you do not have a v2 or v3 and a quality set of headphones I urge you to grab a pair and perform these mods or have mike do them for you.... Its pure bliss .... You could spend thousands on a quality amplifier and a pair of speakers only to come second best to the sound from a rock grotto xcan and a pair of good cans !!!

 the fact it's working says you've hooked it up correctly and, yes, I found it slightly helped the overall coherence (not dramatically but every little bit helps make the overall picture clearer)