Deleted
Deleted Member
Posts: 0
|
Post by Deleted on Feb 19, 2013 1:44:33 GMT
|
|
Deleted
Deleted Member
Posts: 0
|
Post by Deleted on Feb 19, 2013 1:48:23 GMT
Bought 4 OP134 from RS Comp. .......................first one I used was OP2134....................I just looked at the specs..................dif pin out so no wonder it got hot.
second pic is what's now in both amp modules.
Probably why I had problems at start.
Thanks Alex, bed calls, G'night
Alan
|
|
pagan
Been here a while! 
Posts: 512
|
Post by pagan on Feb 19, 2013 11:56:12 GMT
Hi Shaun, I'll need to stack the trafos, so will be looking for some long screws from eBay (nylon if I can find them). Jon Stacking the trafo's ...... Use one metal bolt through the center, ring metal and rubber washer on top, rubber washer between trafo's, one rubber washer on bottom, and bolt to metal in one(1) place only. Allan |
|
pagan
Been here a while! 
Posts: 512
|
Post by pagan on Feb 19, 2013 12:11:28 GMT
I think Alex said the opa134's...... The opa134 is a single output opamp. The opa2134 is a dual output opamp. The pinout's are also different. Allan |
|
Deleted
Deleted Member
Posts: 0
|
Post by Deleted on Feb 19, 2013 12:17:08 GMT
In addition to what Allen said above and in Mikes belts & braces tradition; I also cut a disc of plastic, same format as the rubber ones but a little larger diameter. Place this between the opposing rubber discs of the stacked transformers for total peace of mind  ( I also bolt down each transformer invidually, the plastic dics make sure this does not cause any problems ) I |
|
jonclancy
Been here a while!  Mr. Ripple Eater
Amateur EAGLEist
Posts: 1,131
|
Post by jonclancy on Feb 19, 2013 16:38:47 GMT
My trafos are encapsulated, but wil only be bolted through the bottom of the enclosure. The bolt length will not touch the top of the lid. I am assuming this will be enough to avoid a shorted turn?? I'm very near to finishing my enclosure. Metal (and thumb) are cut, and just the safety earth point to drill and install.
Cheers
Jon
|
|
Deleted
Deleted Member
Posts: 0
|
Post by Deleted on Feb 19, 2013 17:09:45 GMT
Hi Allan,
I purchased 4 X OPA134 not OPA2134, the supplier RS unfortunately sent 3 X OPA134 and 1 X OPA2134
When Alex picked up on my post quoting OPA2134 I checked it's specs and realised the error.
Regards,
Alan
|
|
Deleted
Deleted Member
Posts: 0
|
Post by Deleted on Feb 19, 2013 18:04:17 GMT
My trafos are encapsulated, but wil only be bolted through the bottom of the enclosure. The bolt length will not touch the top of the lid. I am assuming this will be enough to avoid a shorted turn?? I'm very near to finishing my enclosure. Metal (and thumb) are cut, and just the safety earth point to drill and install. Cheers Jon Hi Jon I threaded five encapsulated traffos and laid them on their sides in my Buffalo. I used nylon threaded rod and nylon nuts, plenty still on ebay and works well, I have stacked two vertically since then, great space saver! The nuts were exactly the size to sit into the moulding on the traffo case top. Syd |
|
Will
Been here a while!  Ribena abuser!
Member since 2008
Posts: 2,164
|
Post by Will on Feb 19, 2013 18:26:44 GMT
Hi Allan, I purchased 4 X OPA134 not OPA2134, the supplier RS unfortunately sent 3 X OPA134 and 1 X OPA2134 When Alex picked up on my post quoting OPA2134 I checked it's specs and realised the error. Regards, Alan That's a bugger Alan. i had the same problem with the last batch of LS devices. They sent a wrong'un through which Syd ended up with. All sorted now though. |
|
jonclancy
Been here a while!  Mr. Ripple Eater
Amateur EAGLEist
Posts: 1,131
|
Post by jonclancy on Feb 21, 2013 15:41:12 GMT
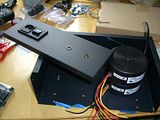
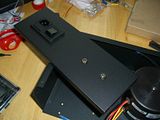
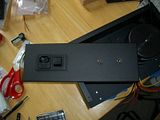
My M6 x 90 bolt is *just* a couple of turns too short to get the nut into "safety". New bolts ordered - CSK and hex to be sure of best fit. In the meanwhile, here are some pics of the rear panel fit-up.    There's a coupe more of that set in the album. I'm satisfied with the level of finish, though using a clamped guide bar while using the square punch may have made life a tiny bit easier (no need for filing a couple of bumps down). |
|
Deleted
Deleted Member
Posts: 0
|
Post by Deleted on Feb 21, 2013 23:41:12 GMT
‘’I'm satisfied with the level of finish’’ Haa I would be Jon it’s superb with the sort of fit and finish that most of us can only dream of. Nice work  Take care |
|
jonclancy
Been here a while!  Mr. Ripple Eater
Amateur EAGLEist
Posts: 1,131
|
Post by jonclancy on Feb 21, 2013 23:53:22 GMT
Thanks mate!!!  |
|
Deleted
Deleted Member
Posts: 0
|
Post by Deleted on Feb 22, 2013 0:03:04 GMT
Hi Jon i'm all eyes for my next build   but after seing your Rolls Royce i may have some second thoughts about posting any more pictures of my Austin Ruby  . take care |
|
Deleted
Deleted Member
Posts: 0
|
Post by Deleted on Feb 22, 2013 19:27:33 GMT
C'mon Shaun show all, all-though I must say Jon's build has a touch of class to it.......nice one Jon and it'll sound even better than it looks.
At last I've got #2 build sounding as good if not better than my first effort so here's a few pics, still a fair bit to do but I've had it working for the last
three hours hooked up to #2 build AKMODSSC15WATT which has been proving it's worth now for a fair few weeks.
Had to replace both PSU modules to get it up and running. Still not sure what was wrong with them but the easy way out for me was to
cut another two PSU boards and build them up, luckily they are both working models first time.
Front end balance is good but not finalised just to make the case lid then get the balance right and lock it down.
Both amp boards are showing almost zero offset so that's good and bias is set at 175mv........may up that before
finally passing the two amps on to my son.
Waiting for a 50K Valabs to arrive and junk the 20K extra cheepo when it does.
Not sure what matching face plates I'll make for both amps but think they'll be glossy black probably with
sparkly bits.
Alan
|
|
Deleted
Deleted Member
Posts: 0
|
Post by Deleted on Feb 22, 2013 19:29:36 GMT
|
|
Deleted
Deleted Member
Posts: 0
|
Post by Deleted on Feb 22, 2013 19:30:24 GMT
|
|
Deleted
Deleted Member
Posts: 0
|
Post by Deleted on Feb 22, 2013 19:31:09 GMT
|
|
Deleted
Deleted Member
Posts: 0
|
Post by Deleted on Feb 22, 2013 19:31:46 GMT
|
|
Deleted
Deleted Member
Posts: 0
|
Post by Deleted on Feb 22, 2013 19:34:20 GMT
Just got two of Alex's nice balanced phono preamps to build for this one, the'll drop nicely into the space between both amp modules.
Nice to get the thing working at last.
Alan
|
|
Crispy
500+
"Done me wrong," it's the same old song" - forever
Posts: 631 
|
Post by Crispy on Feb 22, 2013 19:46:07 GMT
That's a nice build Alan and it looks like I may need your help when it comes to making my XA50 mono amps, especially the casework. Do you know a way of fastening 2mm thick alloy onto 5mm alloy invisibly? I was thinking of maybe something like velcrow? Chris |
|
Deleted
Deleted Member
Posts: 0
|
Post by Deleted on Feb 22, 2013 20:18:52 GMT
Hi Chris,
obviously you need to be able separate the two plates later if you'r considering velcrow, if not then perhaps a thin glue line of epoxy.
Show us a few pics of what's involved, someone will have the answer. Will the 5mm be your faceplate?
Alan
|
|
Deleted
Deleted Member
Posts: 0
|
Post by Deleted on Feb 22, 2013 22:48:16 GMT
Hi Alan Another master class from you and your board etcher great work   for a great sound take care |
|
|
|
Post by gommer on Feb 22, 2013 22:56:19 GMT
Blind tap in 5mm and screw from the back (with a 3-set tap-set)? A good compromise between sturdiness and thread runout would be M4
|
|
jonclancy
Been here a while!  Mr. Ripple Eater
Amateur EAGLEist
Posts: 1,131
|
Post by jonclancy on Mar 6, 2013 13:44:42 GMT
Some great work going on here, guys!!  A little update from me: Just sorting out the parts for my final JLHRE build (I just need one more single for this part of the project. My case is already drilled for duals, later on). My 100mm bolts arrived and I have devised a method for addressing the extra few mm. I have had custom cut and delivered a piece of 5mm frosted Perspex. It's exactly the same size as the chassis base plate and I will use the drilled chassis plate as a template and bolt through. This will allow me to "hide" the Nyloc under the chassis, add strength to the 1mm thick steel base ('cos it weights a bit with my over-specced trafos), and... will allow the same use of dissused white LEDs on the main amp chassis to be employed. I even re-visited the LED calculator and have had delivered some 1, 2 and 3W resistors in a few different values to experiment. Will was right, the "try it and see if it gets hot" method doesn't work on measly trimpots!!  Once the base is drilled and fitted up, we'll almost be there for a COMPLETELY finished project. A first (well, a second*) for me. Cheers Jon * My TX102-based Django is also finished. I suppose my Lightspeed clone is, too, but apart from them...  |
|
Deleted
Deleted Member
Posts: 0
|
Post by Deleted on Mar 6, 2013 18:02:17 GMT
Hi John
Your attention to detail leaves me feeling all flat and inadequate.
Good work.
Django mmm you have the one with the MF transformers if i remenber rightly.
Nice
Take care
|
|