|
|
Post by grafter0121 on Oct 29, 2018 23:02:35 GMT
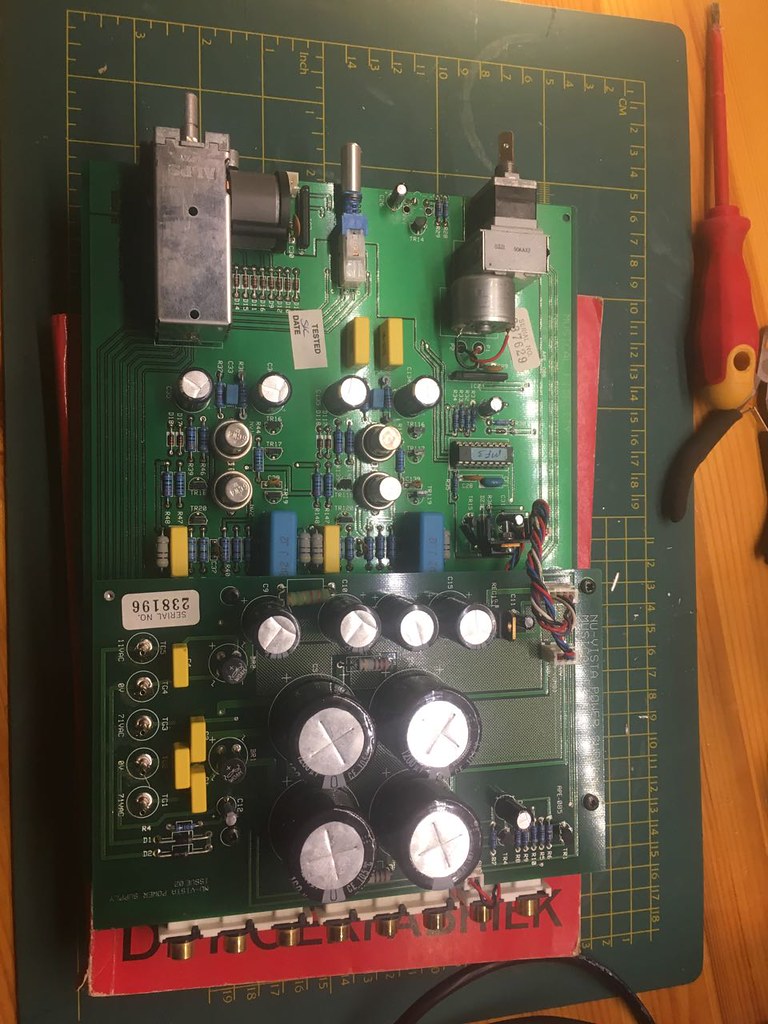
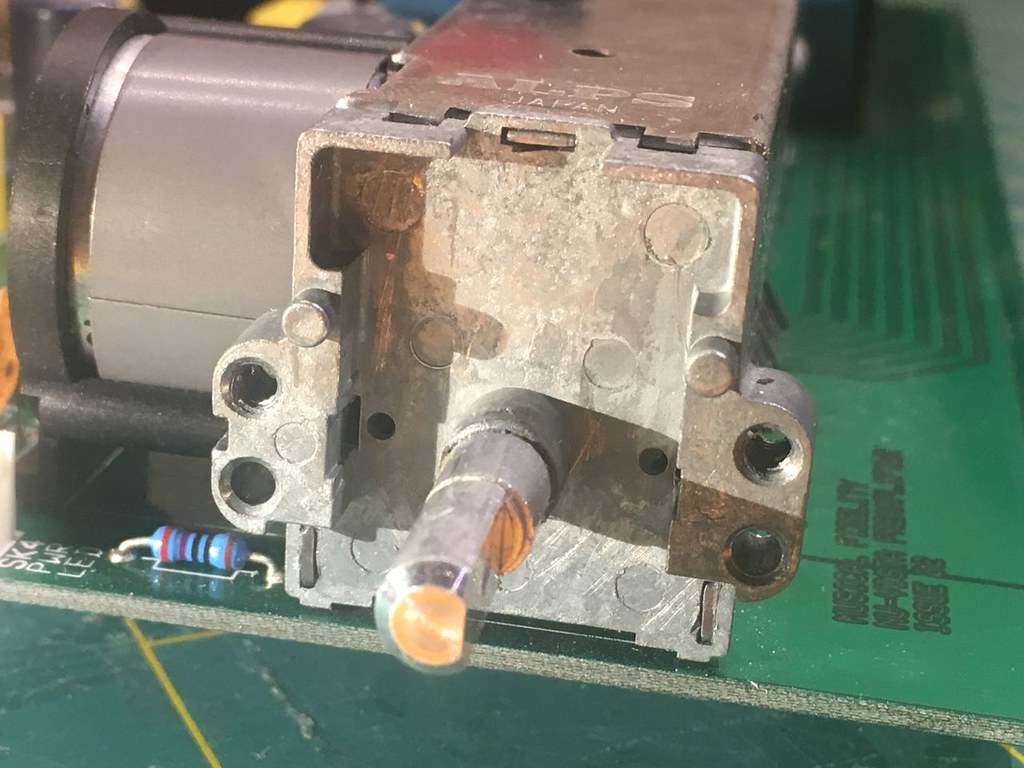
These alp pots are almost impossible to acquire-i have spent countless hours looking and resigned myself to refurbishing my existing pot.... this was my method.
Sorry if this is a little sketchy-its been a while and my memory is not great at 50 something.
Firstly turn the pot all the way to the left.
Then desolder the front anchor points and motor contacts ignoring the 4 wafers for now.
Pry apart the outer cage from the wafer guides on both sides and bend the tags on the front the aluminium case to fit through the slots-then withdraw the front of the assembly away leaving the outer cage and wafers in place, making sure not to turn the shaft of the pot whilst withdrawing.
Lift the outer casing away from the wafers and take a photo of the position of the wafers-the rear 3 are identical and the front one is slightly different with locating pegs that line up with the pot gear
Remove one wafer at a time using low melt solder, swamping all of the connectors all at once with one big blob of solder-this will eliminate the risk of pulling one or more pads as there are contacts on both sides of the board.
Dont be tempted to force the wafer up, let the solder do the work and clean up with solder braid after all 4 wafers are removed.
Clean the contacts inside the wafers with tooth paste and cotton buds until shiny-one wafer at a time to eliminate the risk of mismatching the parts.
Clean with iso alcohol and lightly smear silicone grease over the entire contact area-don’t overdo it with the silicone grease.
Gently lift the 2 contacts on the plastic wafers to add a little extra tension to the contacts when assembled.
Once you have gotten this far then reassembly will be reverse of disassembly making sure to mimic the wafer positions from the photo you have taken
This method has worked for me with no problems whatsoever for the last nine months and still going strong.
|
|
|
|
Post by PinkFloyd on Oct 30, 2018 9:50:06 GMT
John Sampson should know the part number: info@jsaudiorepairs.co.uk
|
|
|
|
Post by PinkFloyd on Oct 31, 2018 9:34:12 GMT
Did you contact John Nando?
|
|
|
|
Post by eightdigitword on Nov 23, 2018 19:23:49 GMT
Hey Nando,
did you get the source selector working?
I have serviced a few of these and can show you the way.
the Alps unit itself is discounted but is easily serviceable. try giving it a good drench with switch cleaner then moving the switch back and forth. sometimes called contact cleaner. I think the main ingredient is isopropanol, use a straw nozzle thing to get inside. hopefully that will clean it.
If this doesnt work you need to remove the motor bracket legs by de soldering it from the board and the cage that covers the switch body also need to be removed. inside is 4 switch plates. note the positioning of the grey discs when you open it up. take all the grey plastic discs off and clean the copper contacts with the isopropanol using a cotton 'bud'.
|
|
|
|
Post by eightdigitword on Nov 23, 2018 19:36:31 GMT
|
|
nando
Been here a while!  The Frying Dutchman
Always look on the bright side of life
Posts: 393 
|
Post by nando on Nov 23, 2018 20:14:48 GMT
I have tried to find this switch too but no succes.
I will try and clean it but my tools are in boxes in storage at the moment. We are moving but haven’t found a good place yet.
Is there a replacement remote contole? Mine is broken.
|
|
|
|
Post by eightdigitword on Nov 26, 2018 9:00:53 GMT
the remote can be replaced with most universal remotes. The one im using to control everything is the logitech harmony 650. I just told it the make and model of everything i'm using and it knew what to do. it is quite expensive but has makro commands to control everything. if i press listen to music it turns off the tv, turns off the av receiver, turns on my audio amps and media streamer all with one button.
|
|
nando
Been here a while!  The Frying Dutchman
Always look on the bright side of life
Posts: 393 
|
Post by nando on Feb 10, 2019 16:41:18 GMT
I am trying to remove the casing of the selectorswitch. It's not cooperating at all. Tried to desolder and remove the whole thing, stuck where it is. I am a little out of ideas at this moment.
|
|
nando
Been here a while!  The Frying Dutchman
Always look on the bright side of life
Posts: 393 
|
Post by nando on Feb 10, 2019 16:42:01 GMT
Hey Nando, did you get the source selector working? I have serviced a few of these and can show you the way. the Alps unit itself is discounted but is easily serviceable. try giving it a good drench with switch cleaner then moving the switch back and forth. sometimes called contact cleaner. I think the main ingredient is isopropanol, use a straw nozzle thing to get inside. hopefully that will clean it. If this doesnt work you need to remove the motor bracket legs by de soldering it from the board and the cage that covers the switch body also need to be removed. inside is 4 switch plates. note the positioning of the grey discs when you open it up. take all the grey plastic discs off and clean the copper contacts with the isopropanol using a cotton 'bud'. Please help. |
|
nando
Been here a while!  The Frying Dutchman
Always look on the bright side of life
Posts: 393 
|
Post by nando on Feb 10, 2019 21:06:14 GMT
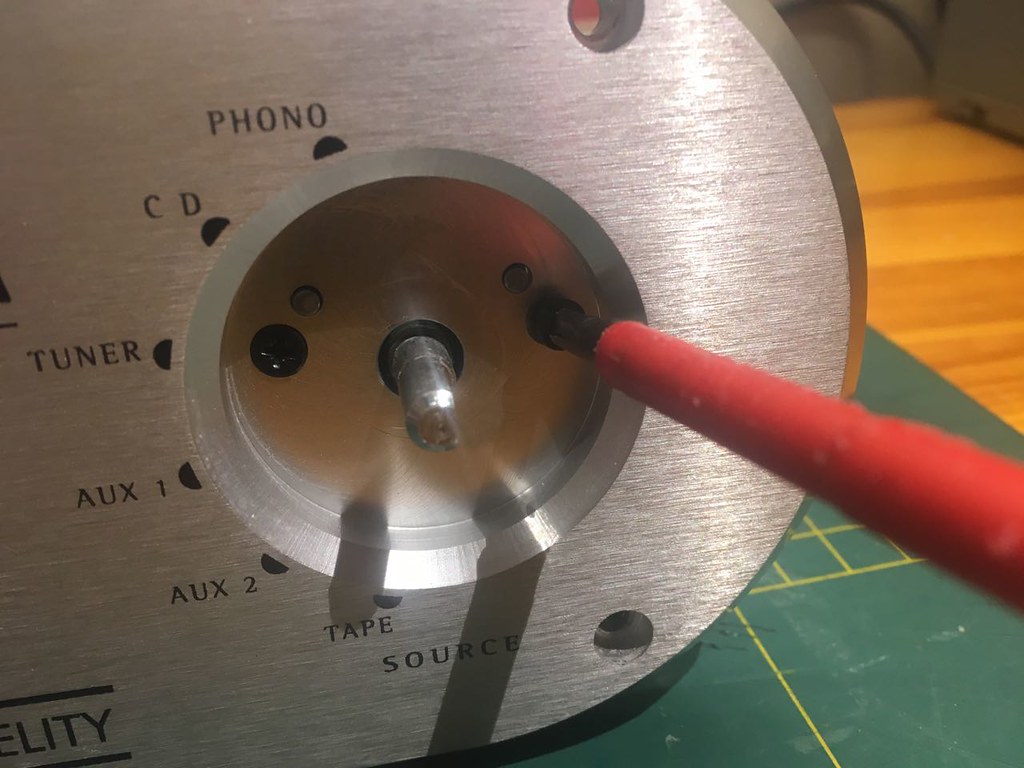
Here are more dismantling guides to a Nu-Vista. Because there are only 500 of these Nu-Vista's made and a lot more xp100 and similar products by MF it will be usefull for a lot more people with those amps.
Make sure you label parts well and make photo's along the way.
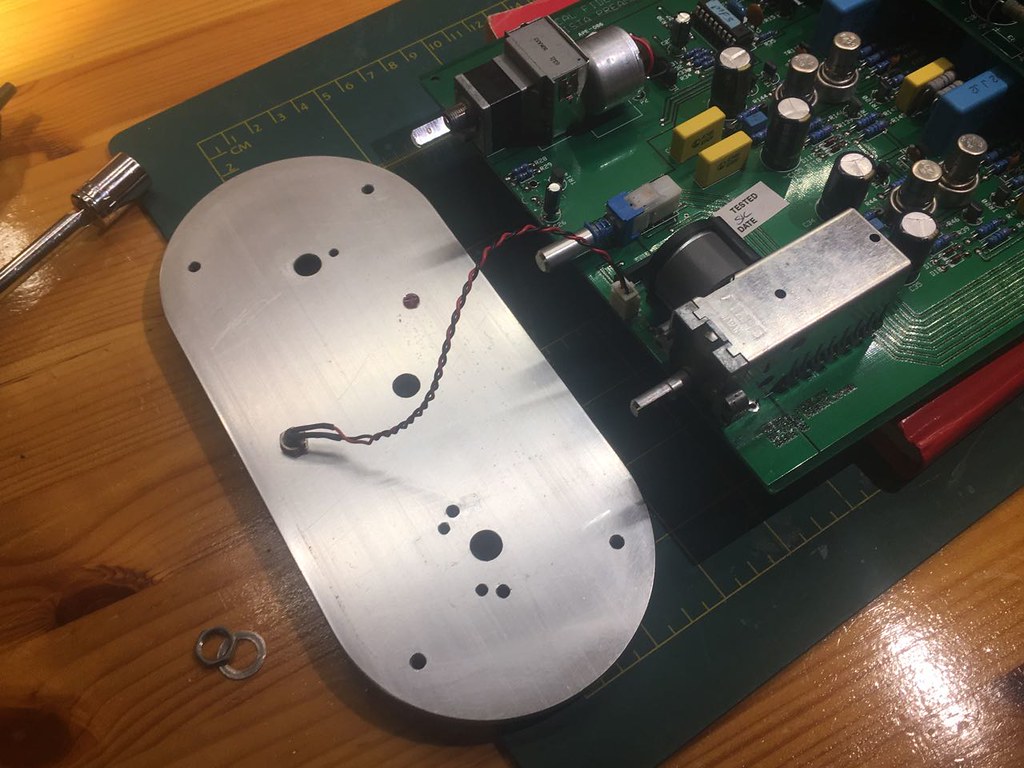
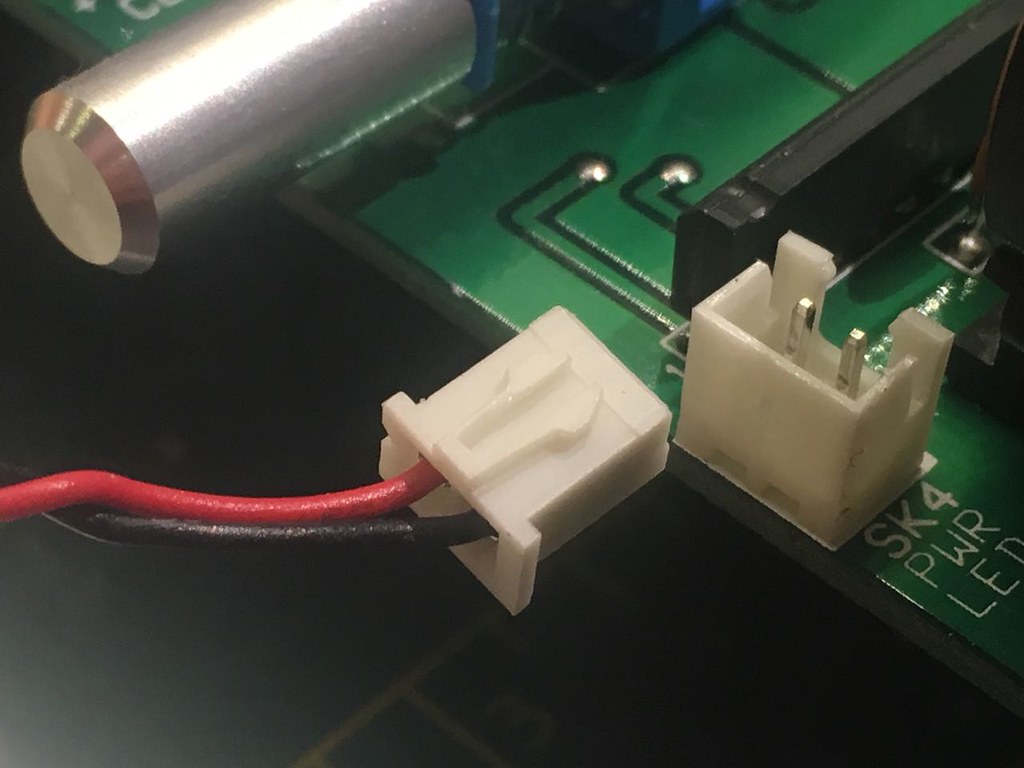
The front comes of and is only connected with one cable.
Then there is only this left.
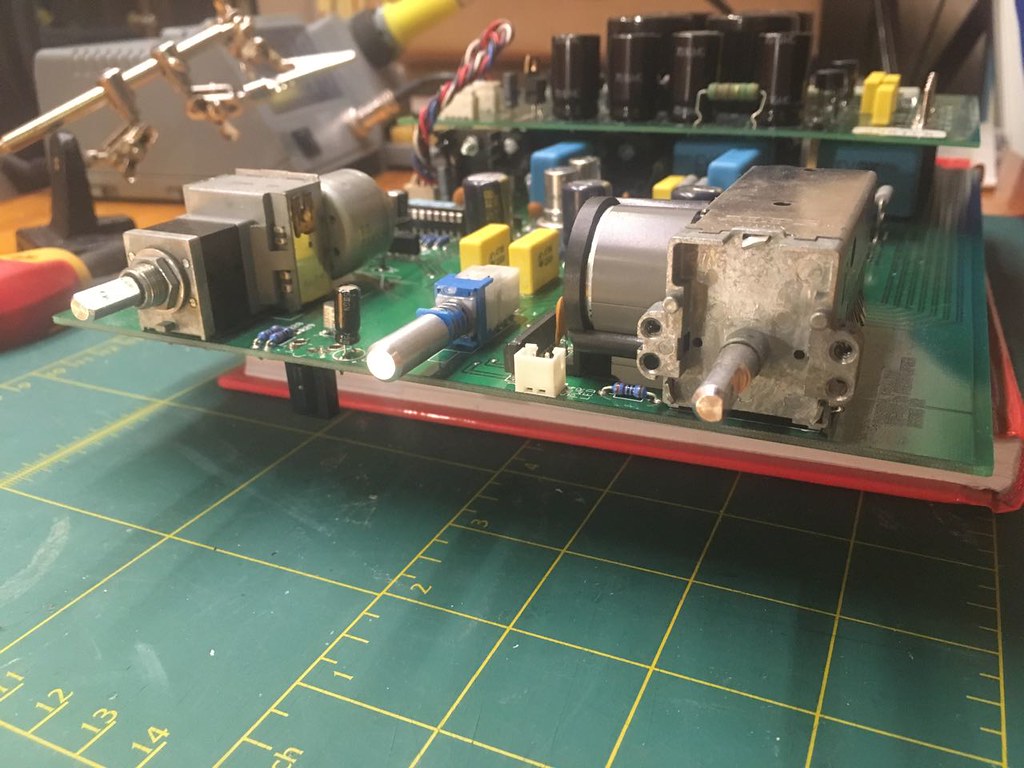
The faulty (or just dirty/corroded) selectorswitch is left top on the pcb.
The front of athe Alps selectorswitch comes off by three little metal plates which are deformed.
The front plate slides out.
Like this. Make sure you don't change the internal of the switch so this rod wouldn't fit any more.
The large four point must be desoldered. Which is the point I am stranded right now.
|
|
|
|
Post by PinkFloyd on Feb 11, 2019 12:32:40 GMT
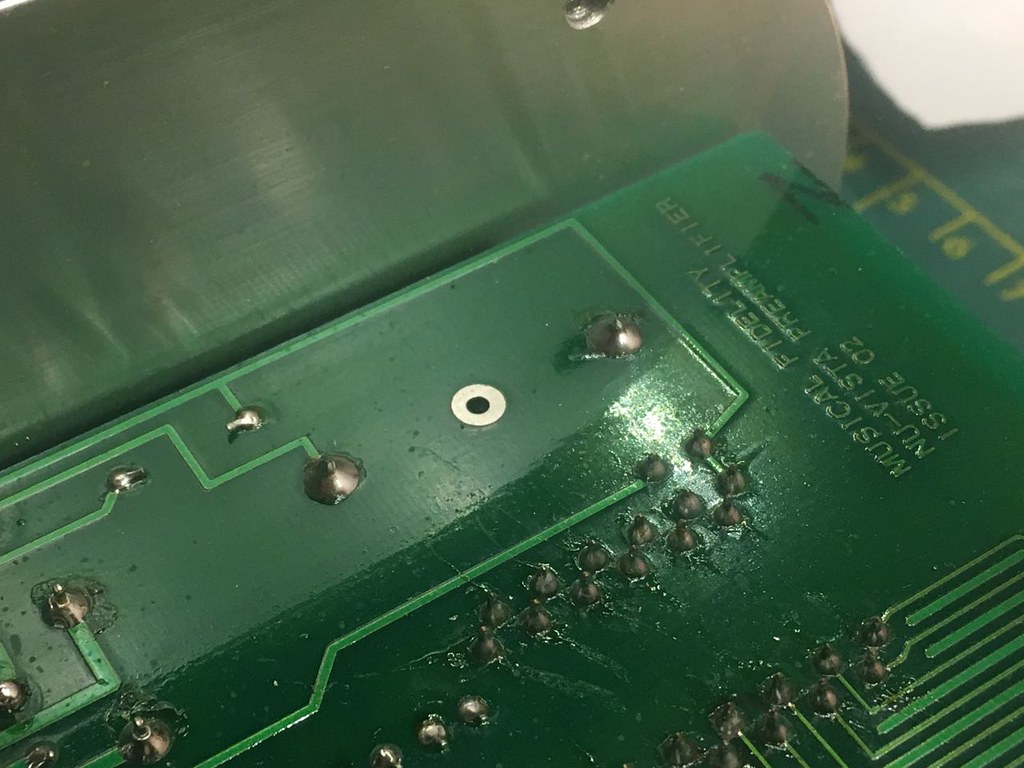
Look like broken solder joints to me Nando....... flood in some fresh solder and that may solve the problem? 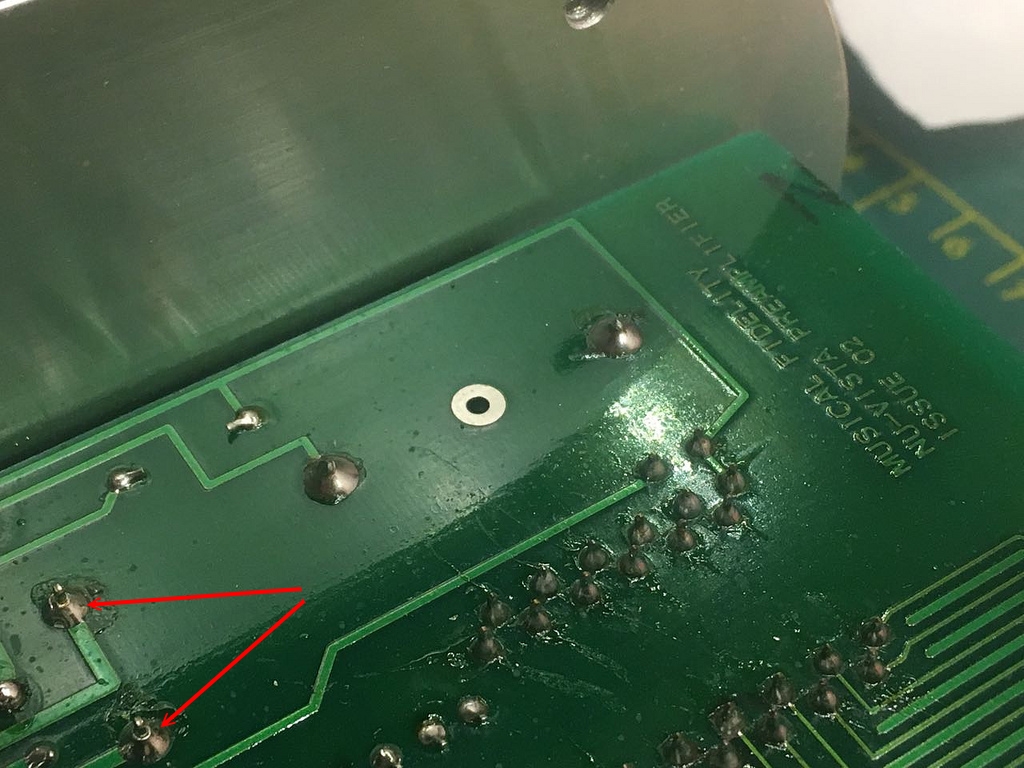 |
|
nando
Been here a while!  The Frying Dutchman
Always look on the bright side of life
Posts: 393 
|
Post by nando on Feb 11, 2019 14:20:04 GMT
I'm a bit puzzeled. Why is that a broken solderjoint to you?
Last time I have opened the Nu Vista I resoldered every point on the pcb. So if it's broken, it's probably my bad.
These two joints you are pointing to are the two connections for the selector motor of the switch. My guess is that there is no music signal going through there, only current for the motor self.
|
|
|
|
Post by PinkFloyd on Feb 11, 2019 18:44:25 GMT
I'm a bit puzzeled. Why is that a broken solderjoint to you? Last time I have opened the Nu Vista I resoldered every point on the pcb. So if it's broken, it's probably my bad. These two joints you are pointing to are the two connections for the selector motor of the switch. My guess is that there is no music signal going through there, only current for the motor self. Sorry Nando, it's probably the camera playing tricks..... you must admit it "appears" as if there is a break between the solder and the leg. I know nothing about that particular pot but do know that your soldering is excellent so the two joins that I arrowed are obviously the camera playing tricks..... oh well, back to the drawing board. If you can desolder the entire pot shebang from the board and send it over to me I'll be happy to crack it open and see if I can sort it out.... I'm not afraid to crack things open and have a prod about under the bonnet  |
|
nando
Been here a while!  The Frying Dutchman
Always look on the bright side of life
Posts: 393 
|
Post by nando on Feb 11, 2019 19:07:03 GMT
Thanks for the offer but the problem is I cannot get the &#%#@(&#@$#$! whole shebang of the board.
There is indeed some light trick going on there. I have several light sources at my workbench so maybe that's the cause.
I wish it was as simple as resoldering.
|
|
|
|
Post by eightdigitword on Feb 26, 2019 10:15:24 GMT
the switch cover and motor are soldered to the board to secure it. you must remove this solder with a solder pump, then the cover will lift free.
when i remember how to add pics ill post them
|
|
|
|
Post by eightdigitword on Feb 26, 2019 10:24:33 GMT
|
|
|
|
Post by eightdigitword on Feb 26, 2019 10:25:26 GMT
|
|
|
|
Post by eightdigitword on Feb 26, 2019 10:26:05 GMT
|
|
|
|
Post by eightdigitword on Feb 26, 2019 10:26:33 GMT
|
|
|
|
Post by eightdigitword on Feb 26, 2019 10:27:26 GMT
|
|
|
|
Post by eightdigitword on Feb 26, 2019 10:29:08 GMT
Unit shown is an A200R, not an Xp100. source selector is the same.
|
|
|
|
Post by chauffeur on May 31, 2024 22:07:00 GMT
At the risk of getting a good kicking for resurrecting this old thread with my first post here . . .
. . . am I right in thinking there's no op-amp inside the Nu-Vista Pre? I know it was something the OP listed it as a component that he was considering changing, but after reviewing the images I can't see anything that resembles an op-amp.
Edit: answering own question . . . no; no op-amps inside the Pre.
|
|


