Deleted
Deleted Member
Posts: 0
|
Post by Deleted on Jun 17, 2015 10:35:24 GMT
Hi
Yes I would love a couple of JLH ripple eater boards .. I will pm my address, many thanks Nick
|
|
|
|
Post by PinkFloyd on Jun 17, 2015 20:44:15 GMT
Hi Nick, I'll send you a couple of the Ripple eaters and a couple of shunt boards tomorrow, let me know how you get on with them: 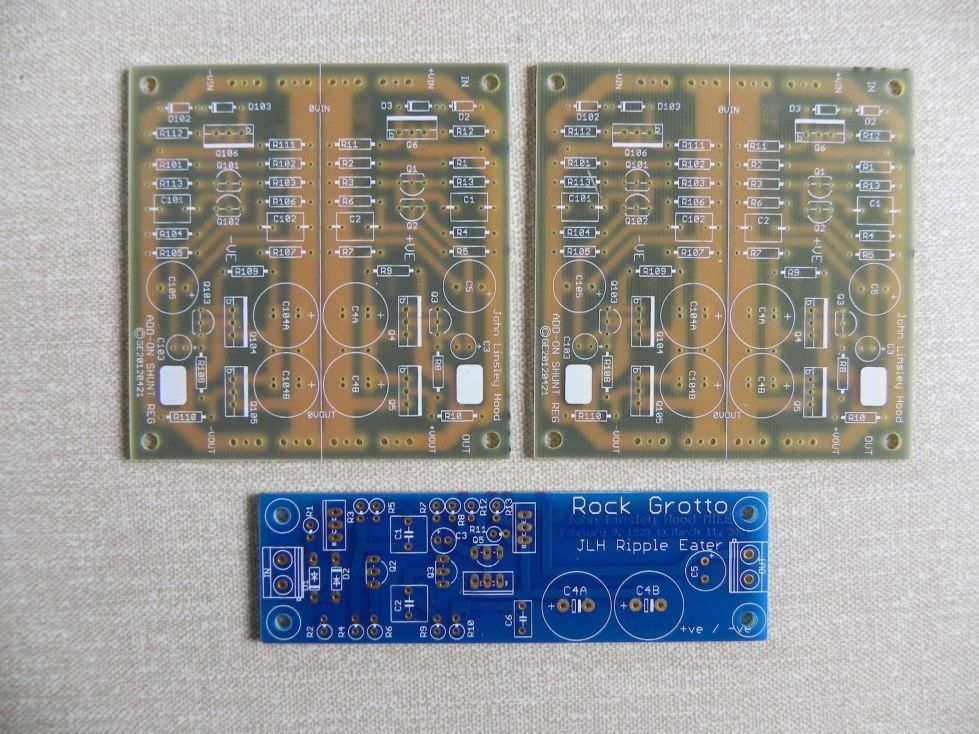 I had a spare couple of hours this afternoon so got started on the "Andante" PSU board. Started off by populating the zero ohm links and where "room" permitted I fitted some axial ferrite links...... won't do any harm and may well do some good   I then fitted the diodes and resistors, can you please confirm that I have fitted the correct diodes as I didn't have my jewellers loupe to hand and could barely see the bastards, let alone read the print on them........ (making out I'm a poor soul so I can win the pork pies).........   It was then in with the bridge rectifier: 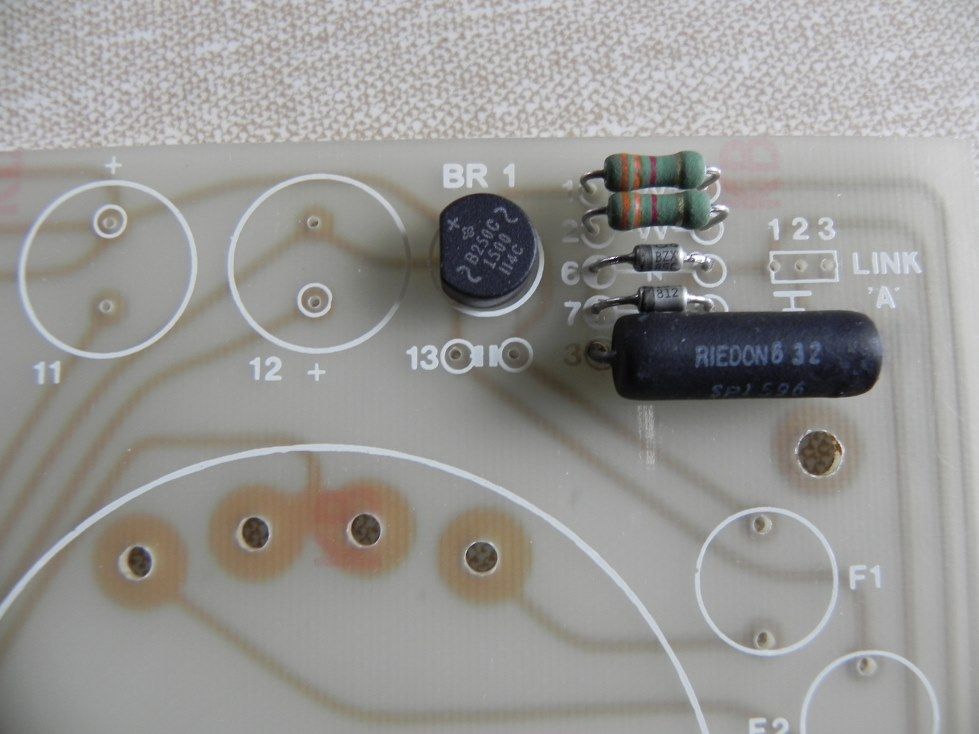 Then the tabs:  A couple of ELNA Silmic ll 100uF: 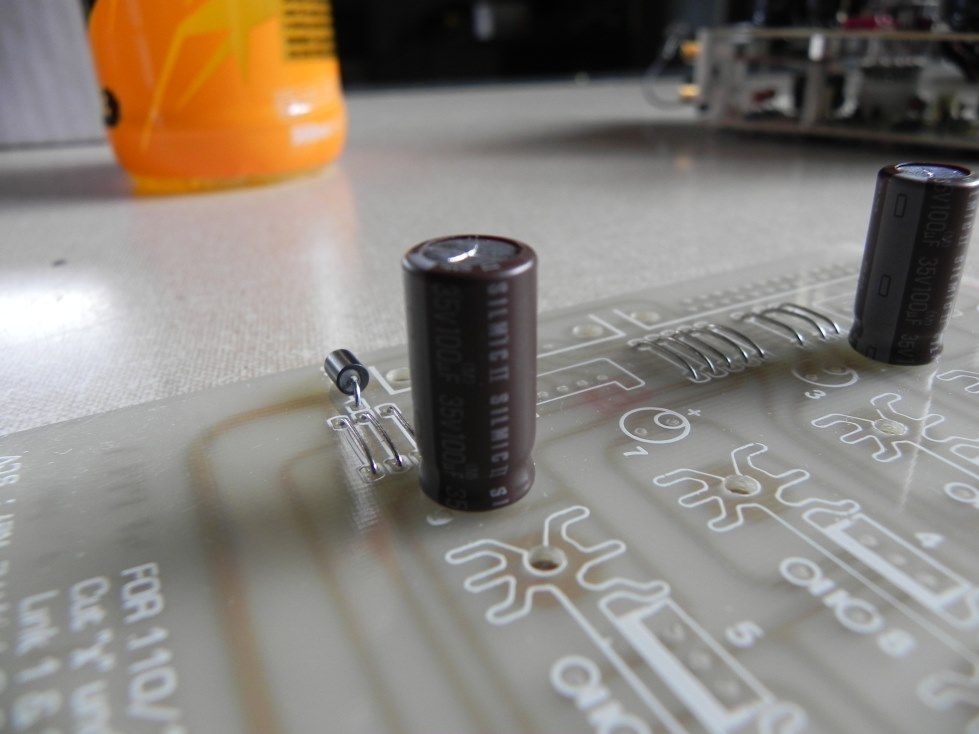 Then it was time to fit the transformer...... it would have been so much easier to fit the original Hart transformer but they don't exist anymore so it was a simple case of raising a 50VA / 18V toroid up on three rubber mounts and hard wiring the ins / outs to the board. From left to right (dual primary / looking at the board from the front / 6 tabs pointing south..... left to right ) it's blue, purple, grey and brown in that order. A piece of cake to me but possibly a blown fuse to somebody else, I'll highlight this aspect of the build separately to make it easy to understand in plain English. 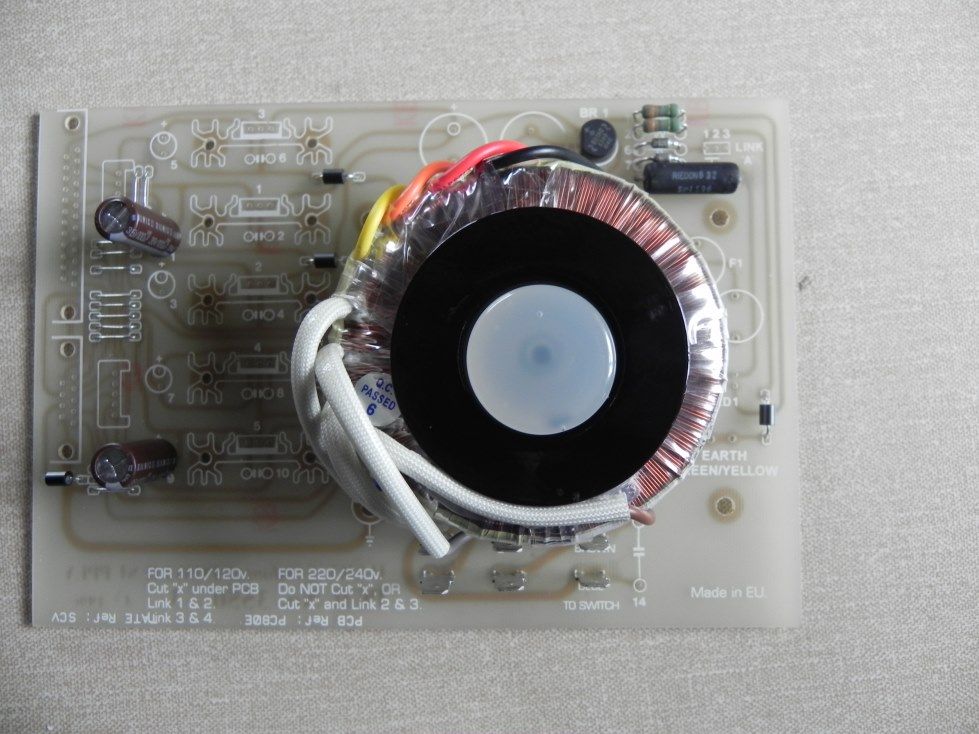 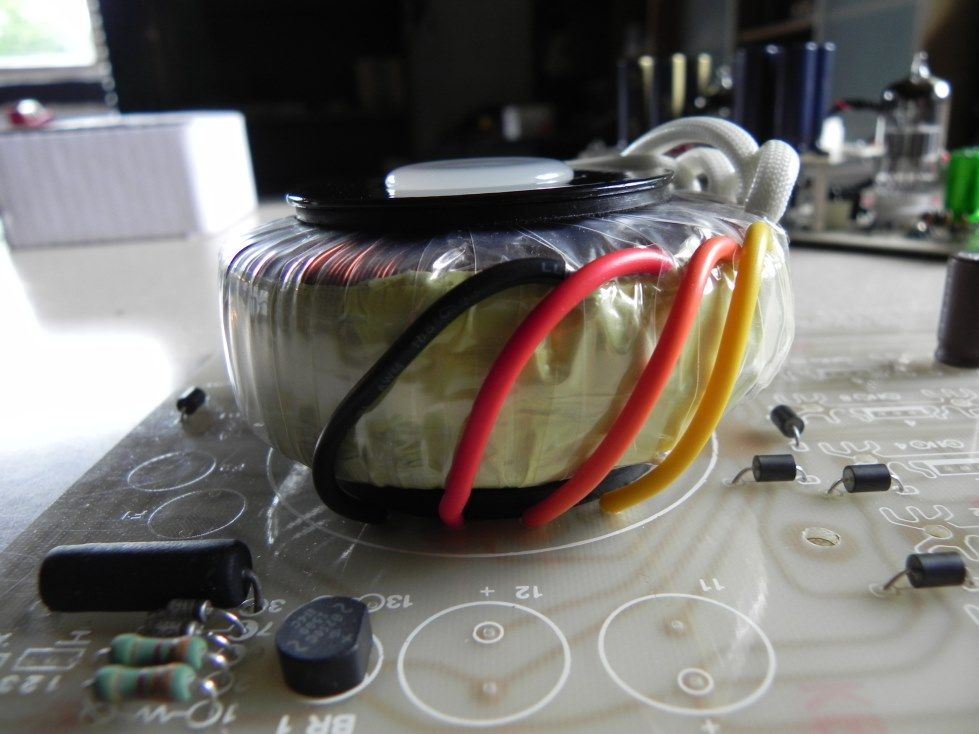 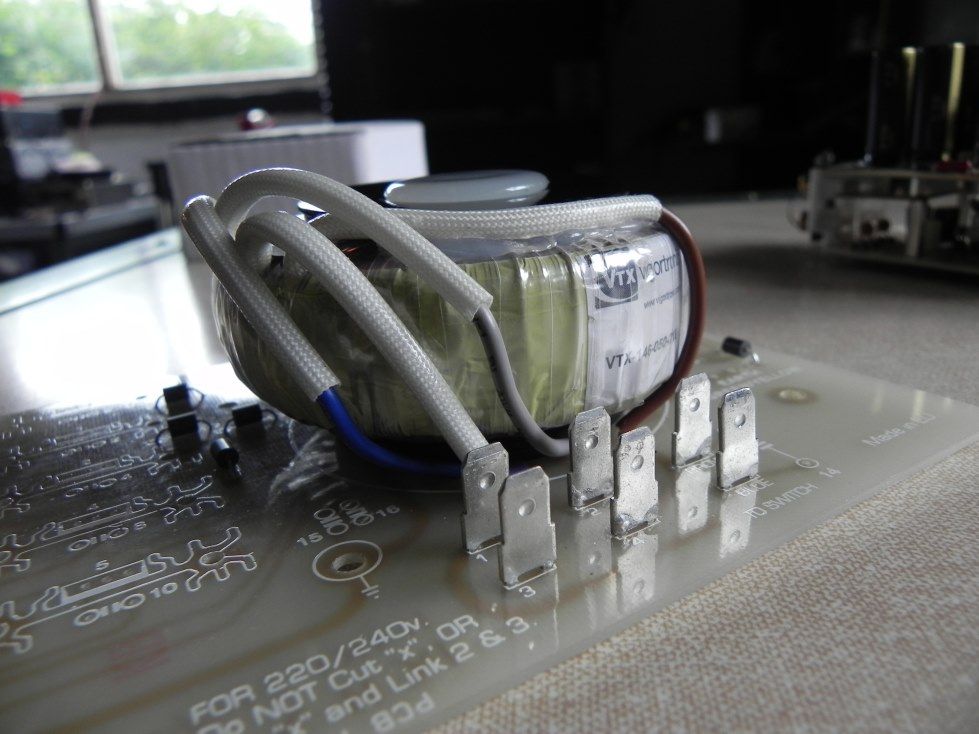 Still have to cable tie the transformers primary leads but you get the general idea. A couple of Nichicon Fine Gold 2200uF...... this will be supplemented with a further 4700uF (making a total of 6900uF) further into the build: 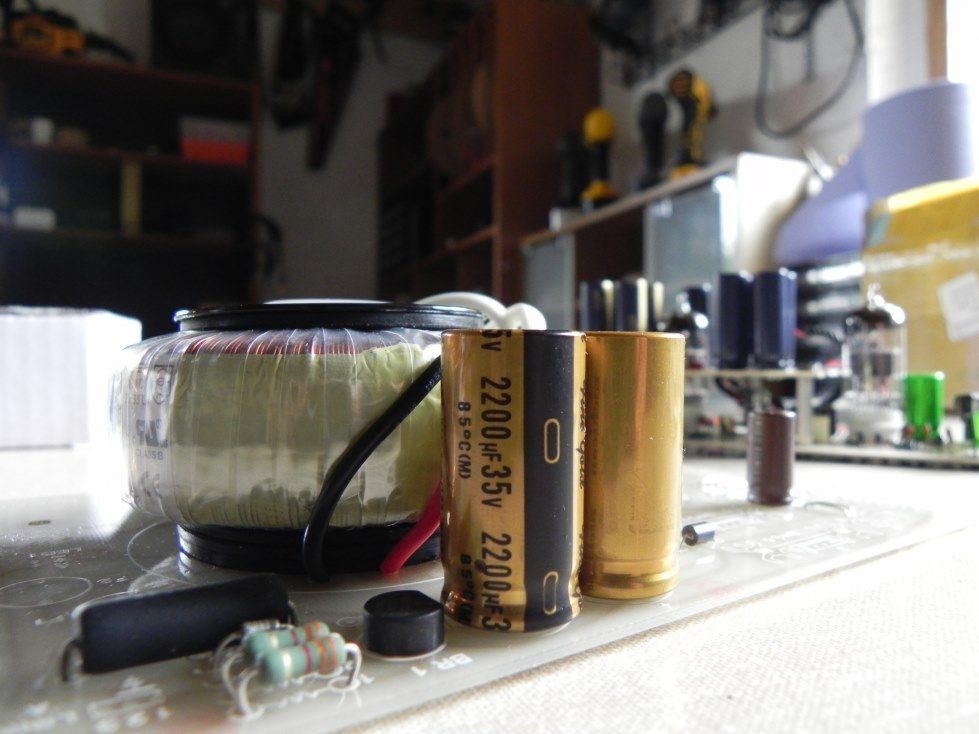 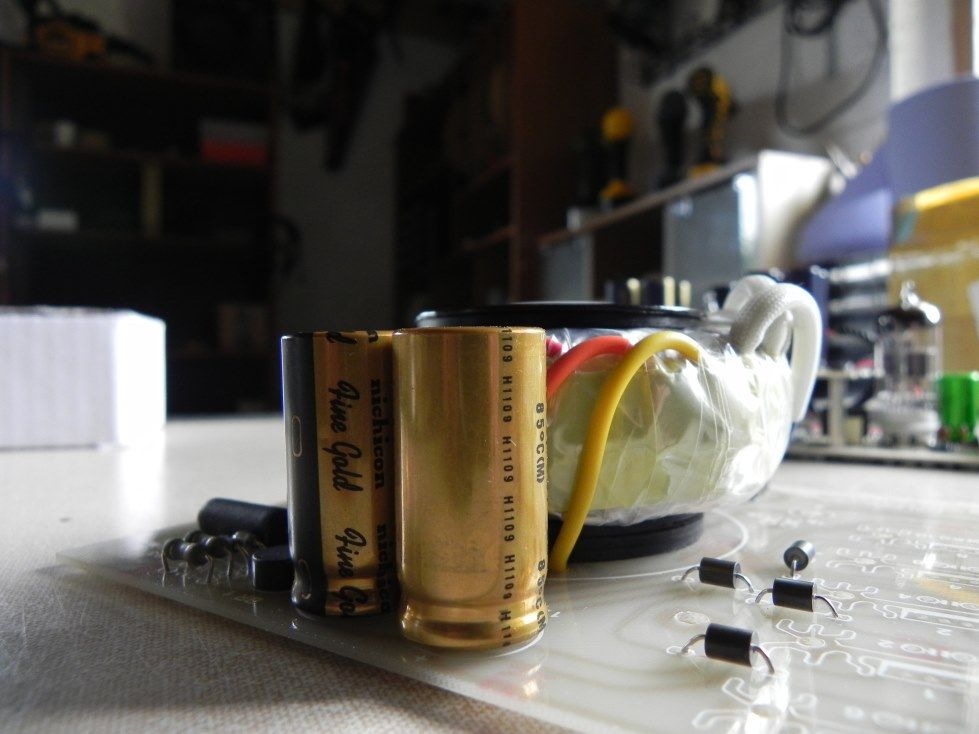 100nF caps: 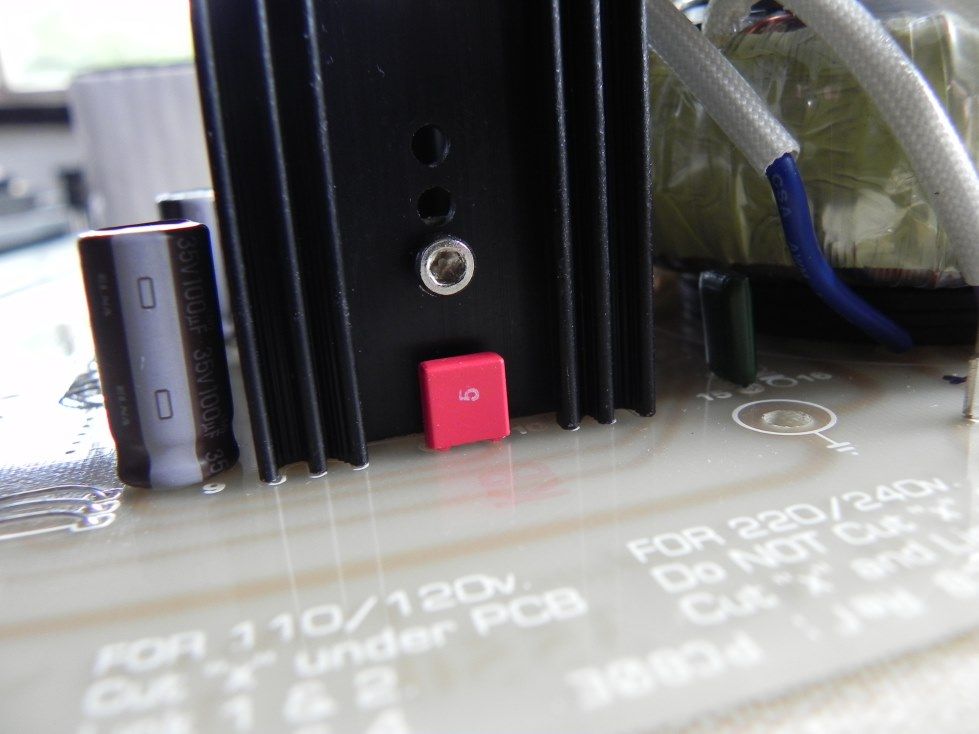 Heatsinks and regulators fitted: 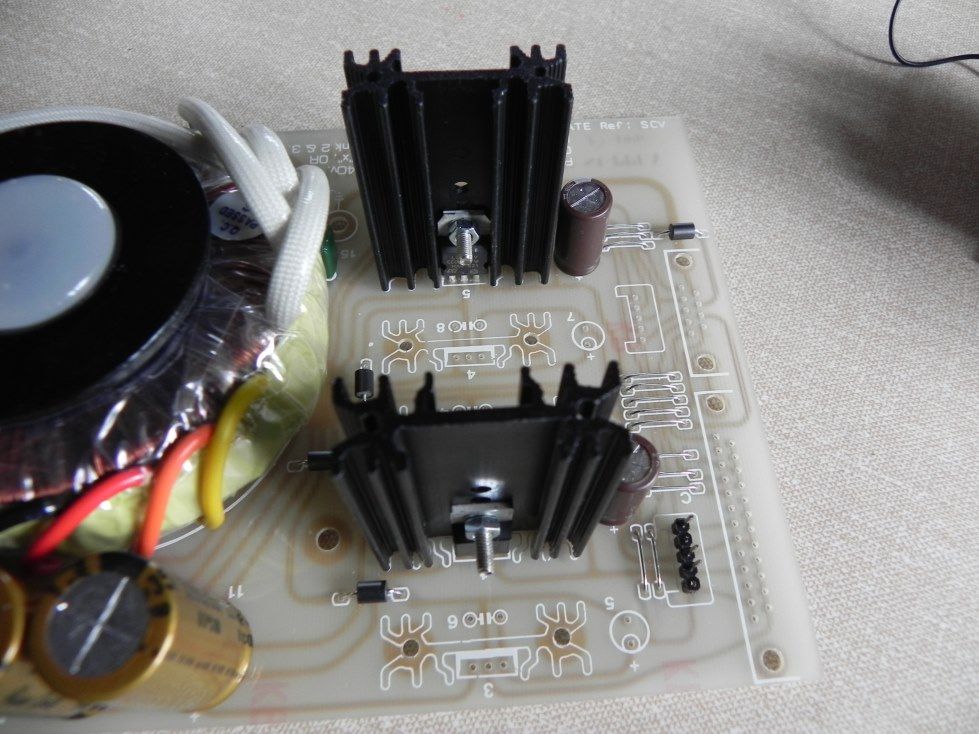 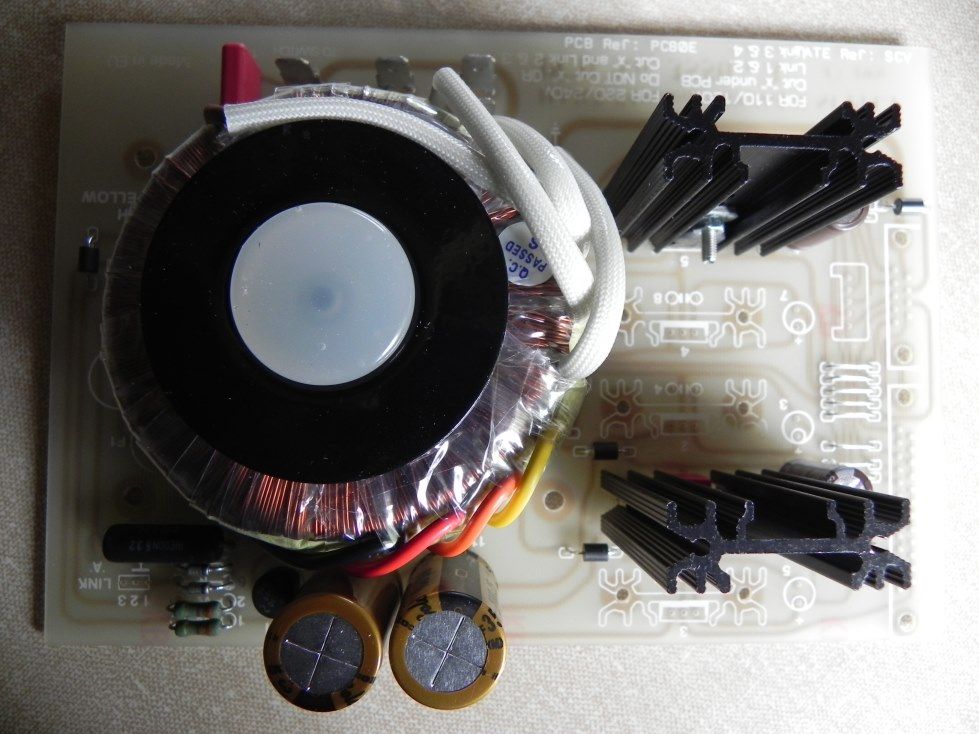 Just awaiting the fuseholders and she should be good to go........ I'll crack on with the "Chiara" over the weekend. Mike. |
|
|
|
Post by PinkFloyd on Jun 18, 2015 19:55:26 GMT
Tidied the transformer wires up a bit today and there's ample clearance for the 6.3mm female tab connectors: 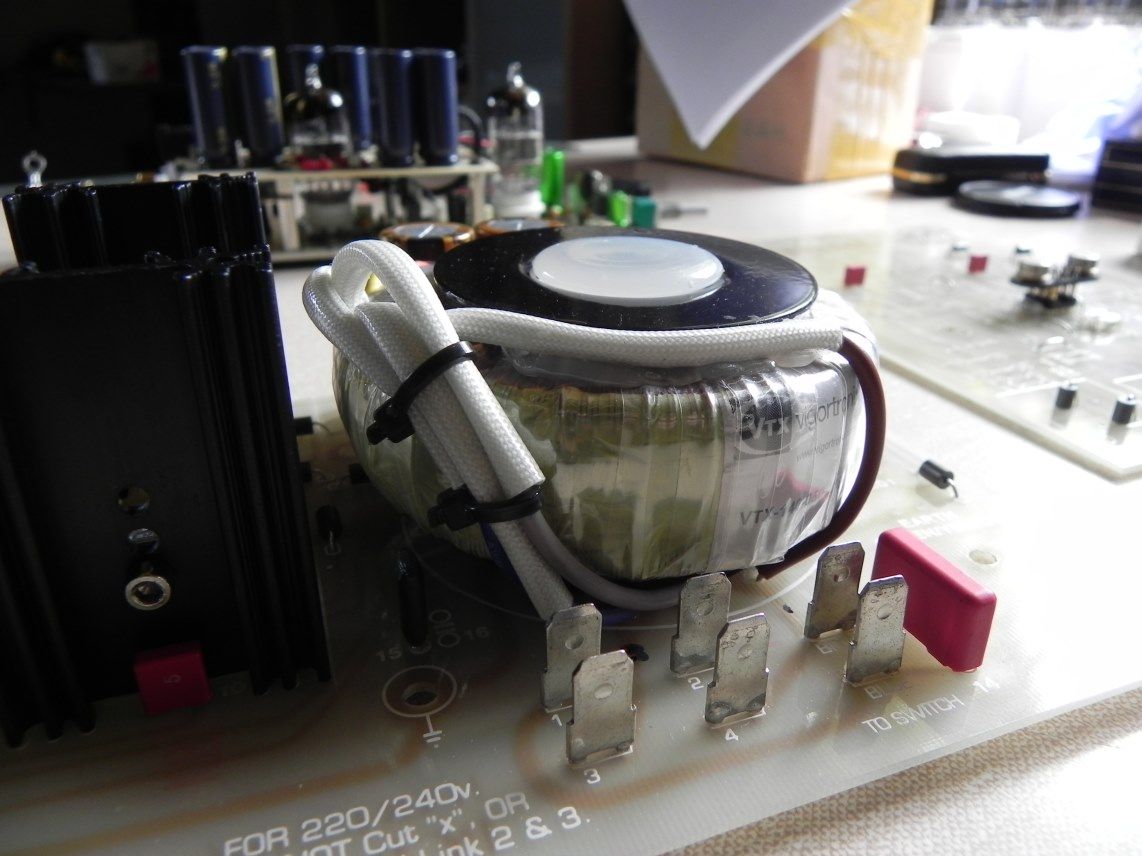 Just have to fit a couple of vertical fuseholders to the PSU board and that's it complete. I had a spare hour so fired the OPA627's onto the BrownDog (2 x single OPA627 onto a BrownDog single to dual converter): 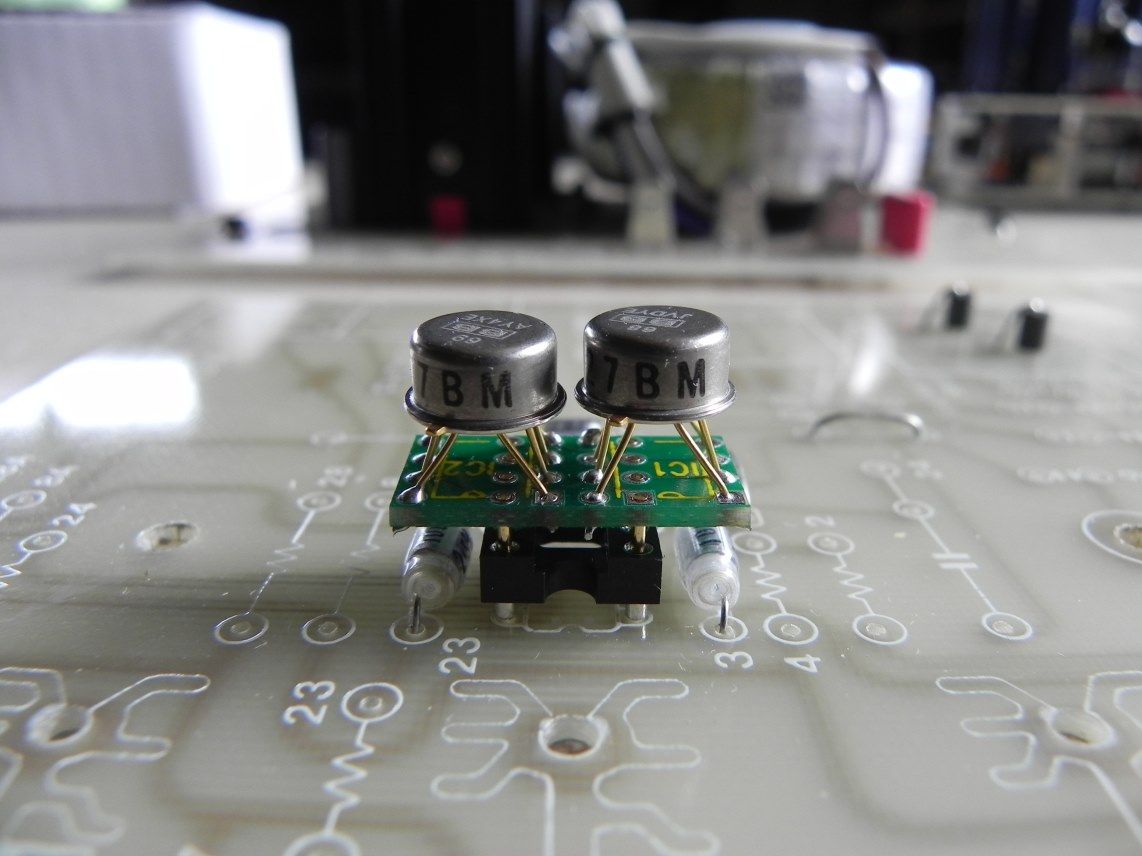 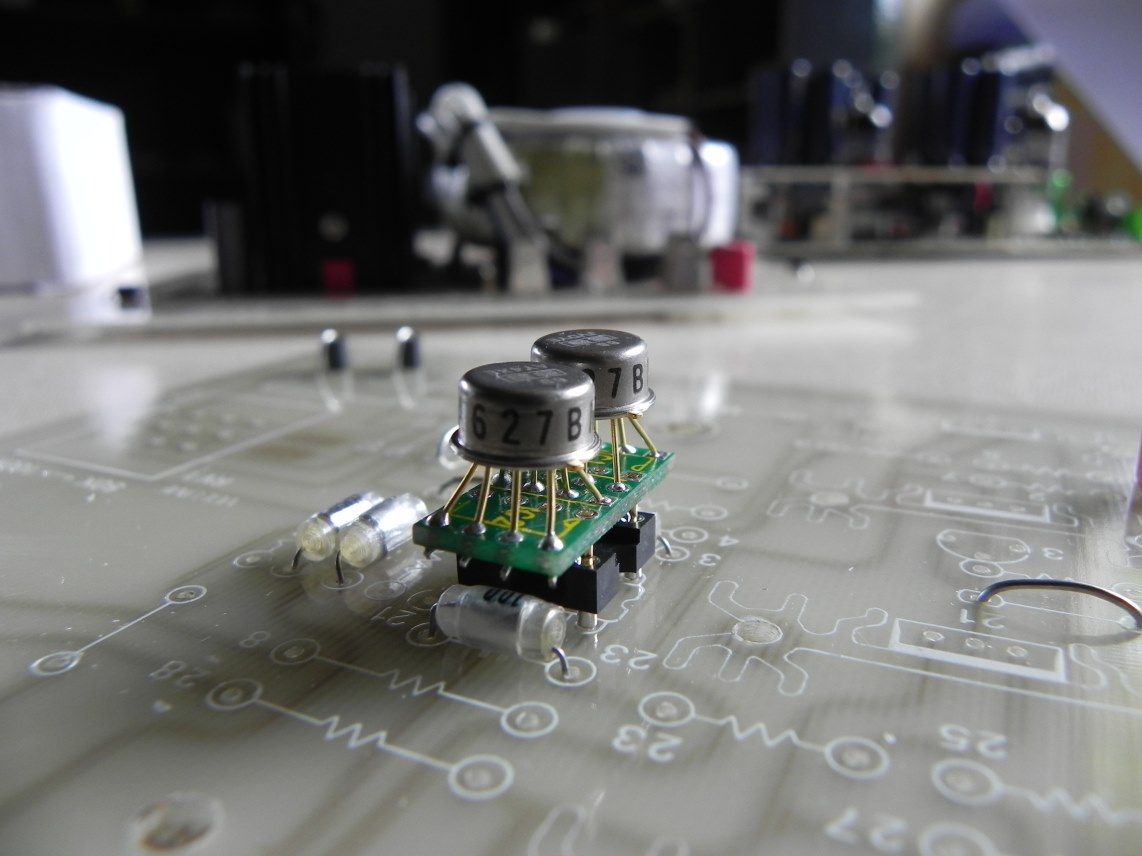 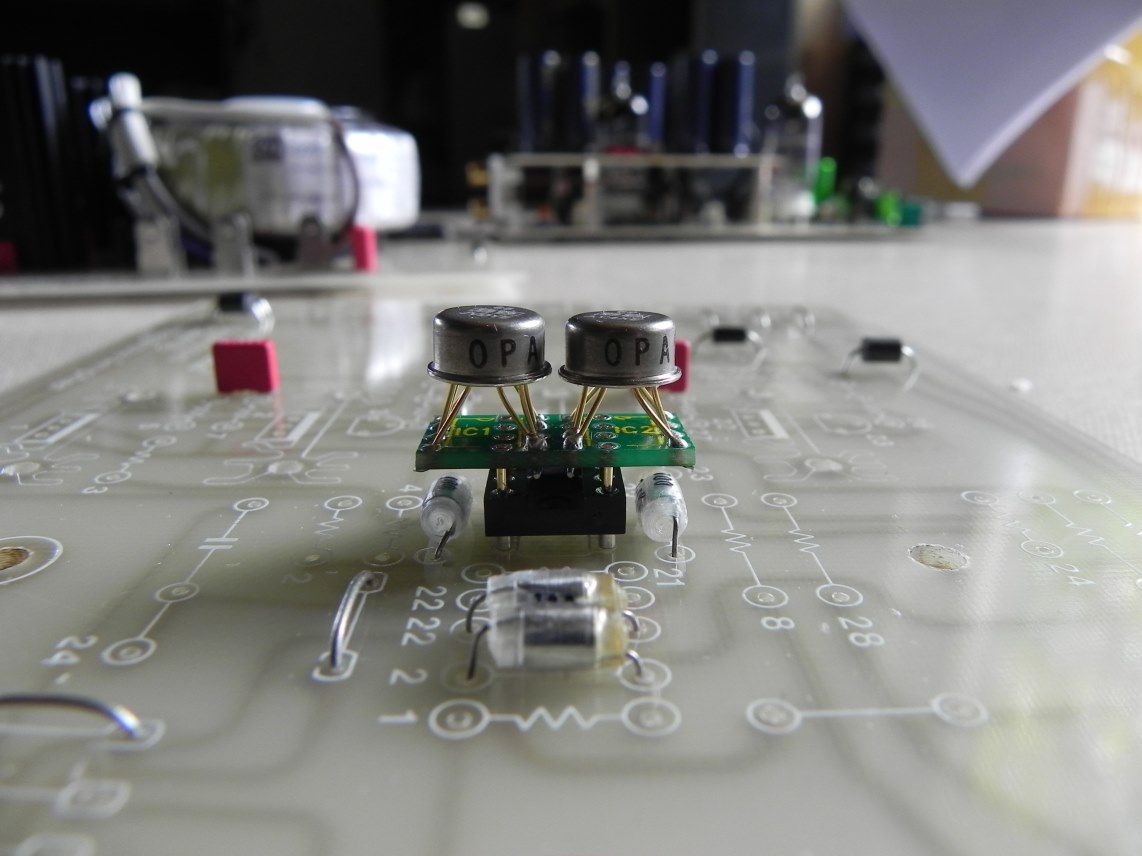 I also fired a couple of "ancient" OPA111 ( rockgrotto.proboards.com/thread/6842/give-whirl-opa111 ) single metal cans onto a single to dual adaptor as I reckon these may be absolutely perfect in the JLH amp. They are nothing to write home about "on paper" but, to the ears, they are a sonic marvel and it would be a crime to not try them in the JLH headphone amp: 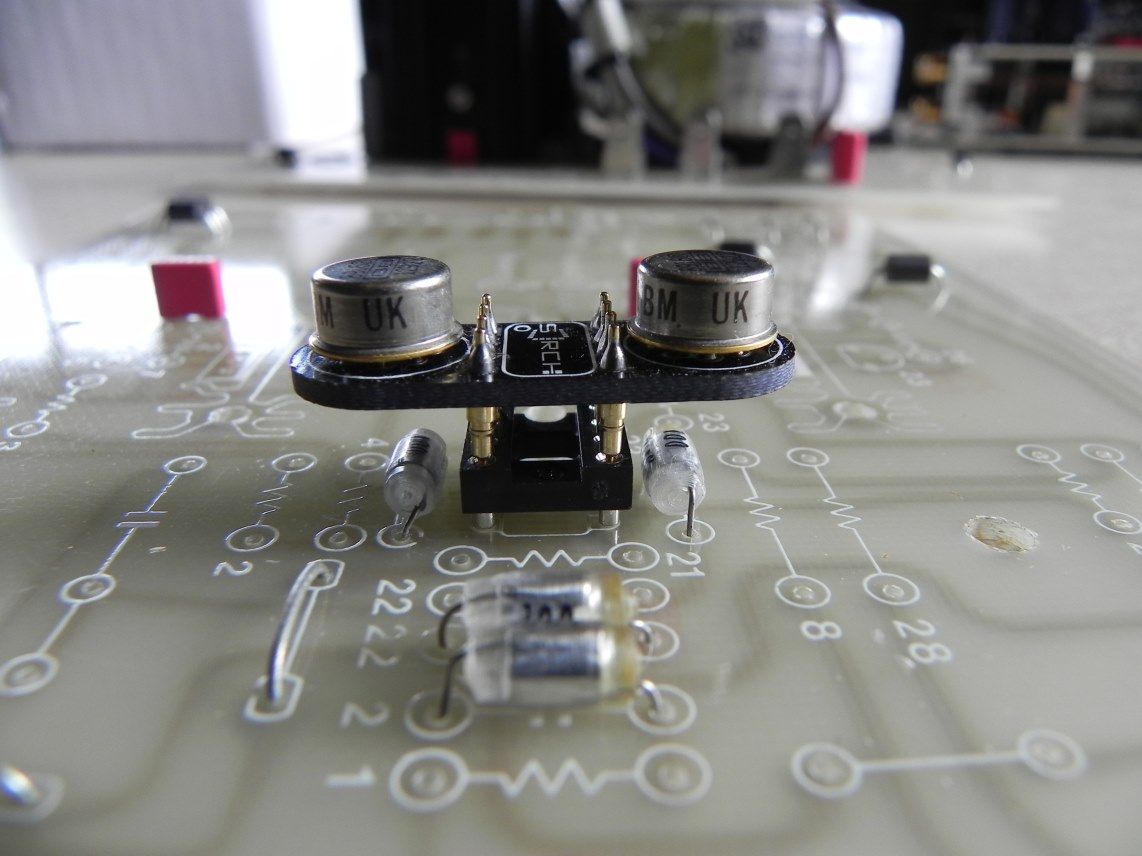 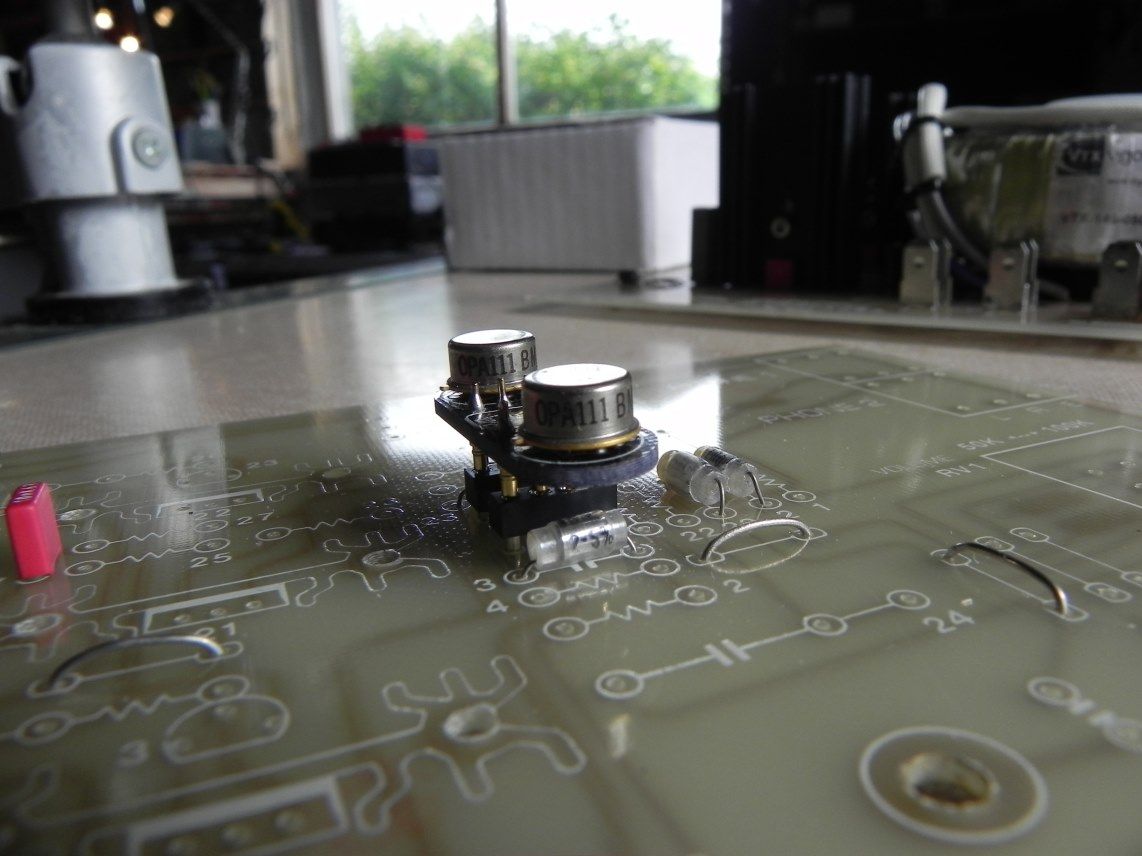 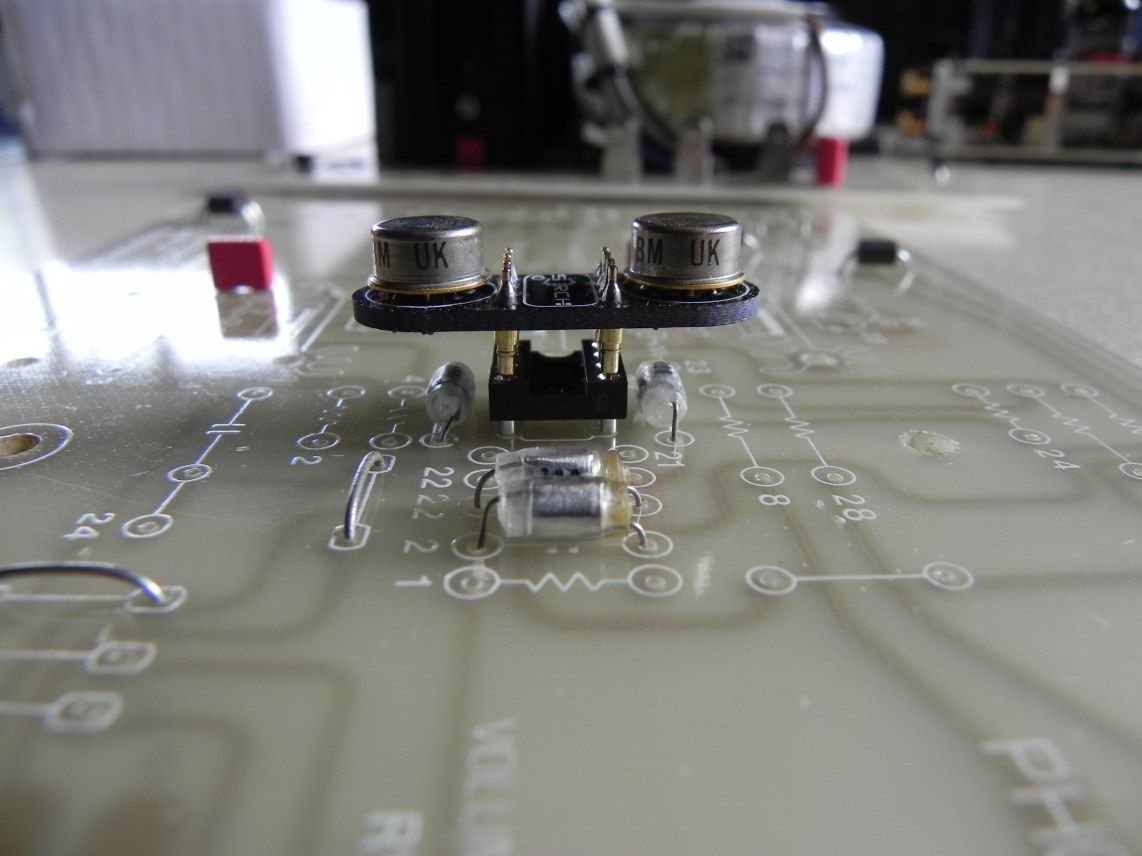 I've got ALL of the usual dual opamps to try so plenty of fun to be had rolling those puppies in as well. The carbon composite resistors should be here tomorrow so I should have the amp board populated by the weekend (workload dependant). I fitted a few of the low level components today and will get the high level components fitted as soon as the resistors are in situ. In certain areas I have fitted axial ferrite bead links as these have proven to be beneficial to the SQ in past builds: 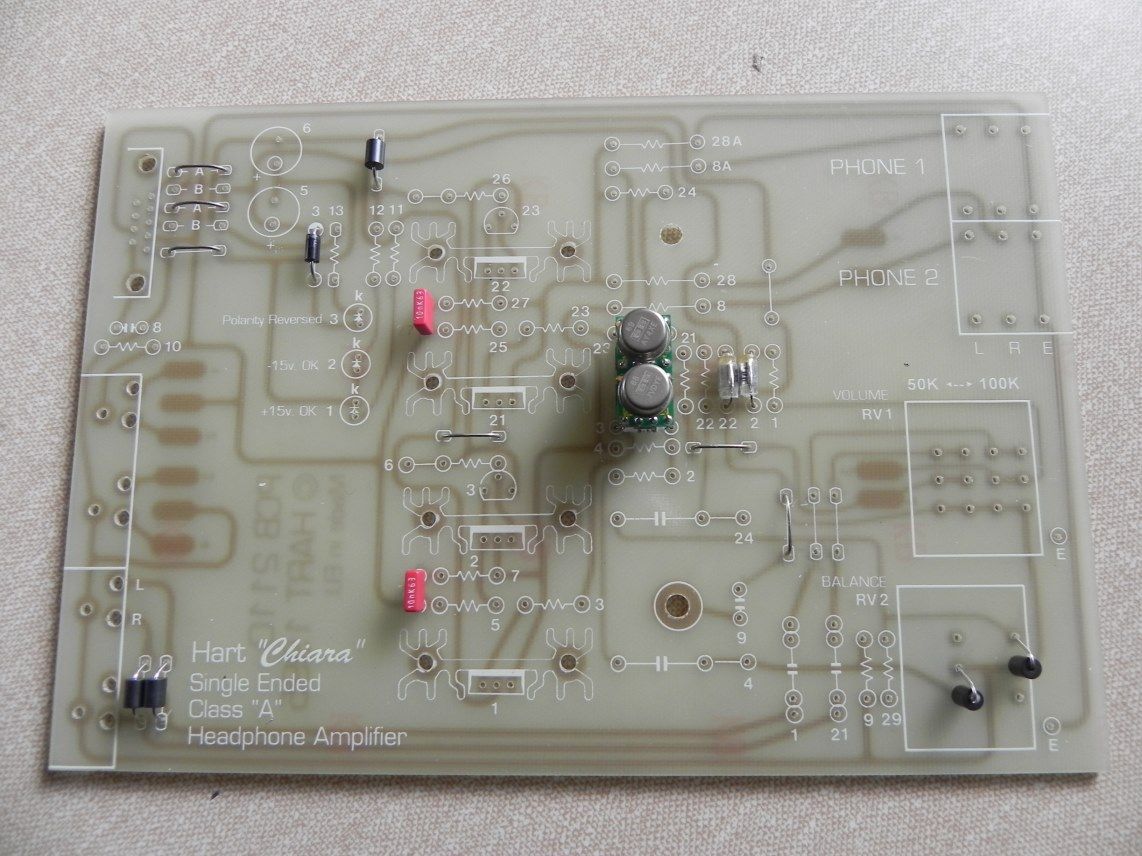 Not quite sure what type of volco to go with..... I've got a couple of stepped (50K) and the ubiquitous 50K log ALPS RK27 (the "Blue Velvet")..... no point buying another pot when I have these to hand so it's just a matter of me deciding which will be the most suitable for the job in hand: 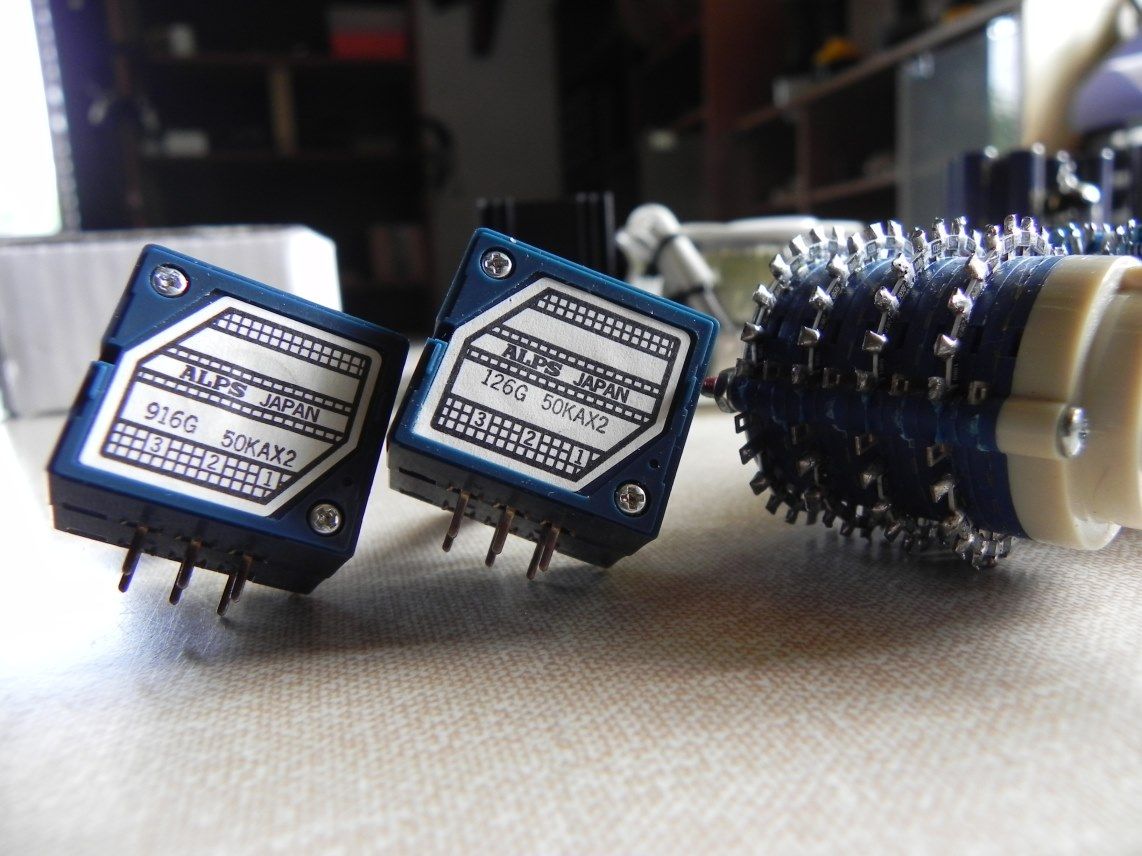 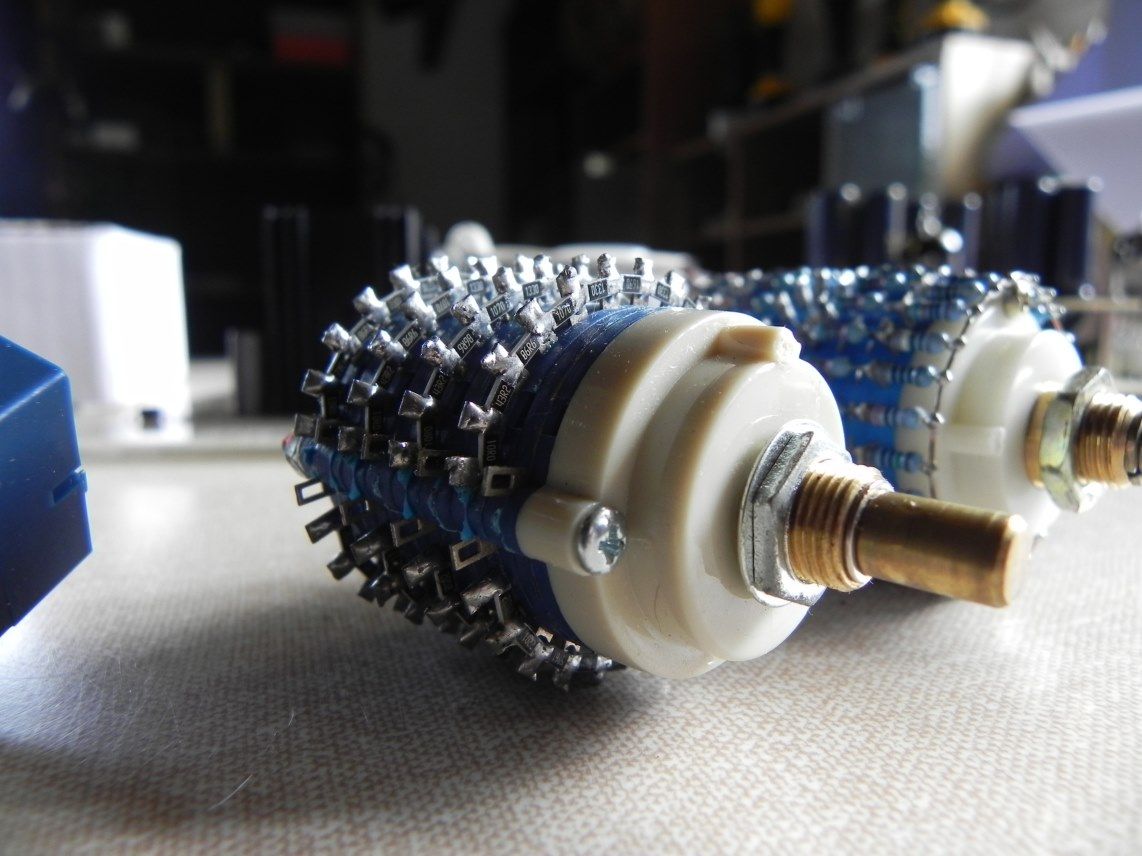 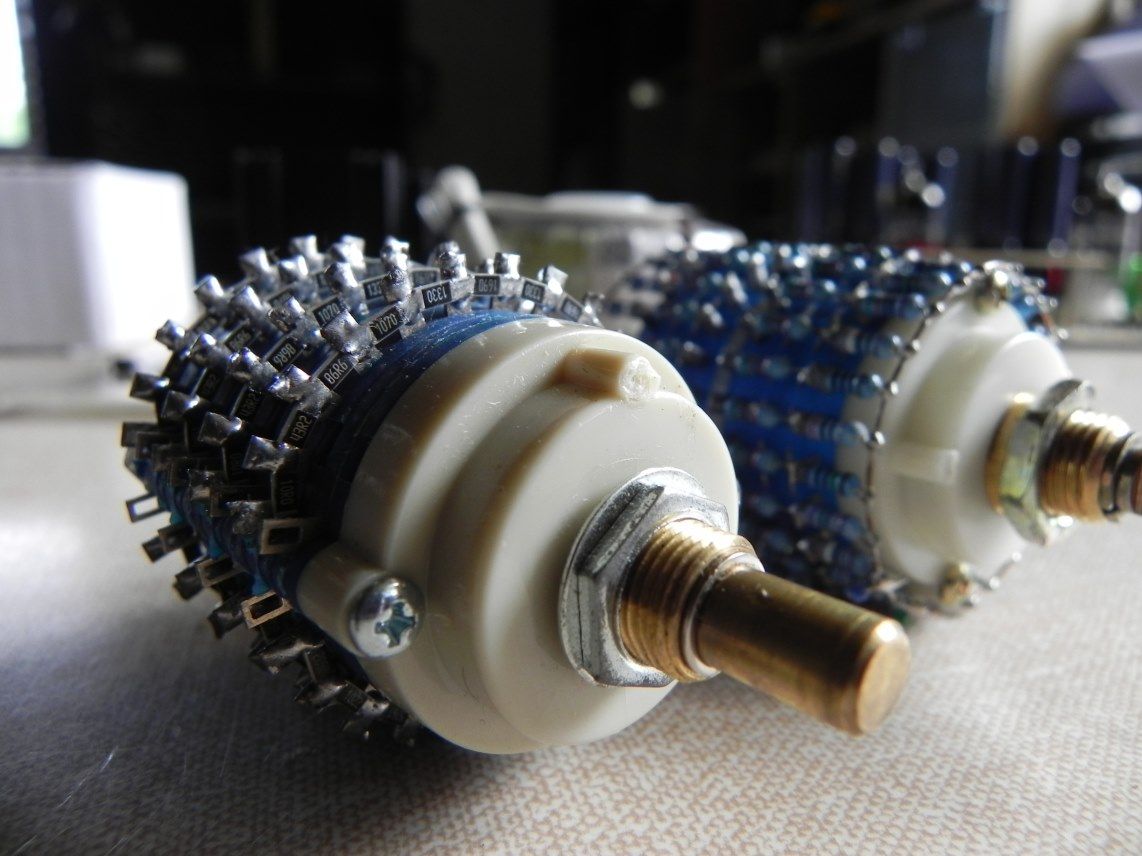  I plan to fit the whole shebang into one enclosure, and that includes the AK / JLH add on shunt regulator too, and the enclosure I have chosen is this one: www.ebay.co.uk/itm/2014-new-aluminum-chassis-case-enclosure-for-headphone-amplifier-320-70-240mm-/251547005798?pt=LH_DefaultDomain_3&hash=item3a915eb366It has the headroom, it has the width and it doesn't look at all bad....... It also happens to be quite reasonably priced. I just HOPE it doesn't come with that "KRELL" badge on the front panel Everything I intend doing should fit into that enclosure with a few mm to spare. Nick, I shipped a couple of JLH shunt regs to you this afternoon, you will have them by Friday...... all the info you need is here: users.tpg.com.au/users/gerskine/greg/default.htm I could only find one Rock Grotto Ripple Eater so you'll only be receiving one I think you'll find Alex's "revised" JLH Shunt regulator most beneficial (SandyK here on the forum) and I am "officially" ending the pork pie competition..... the pork fest is over. Let's just do what we enjoy doing and share our experiences with like minded folk. All the best, Mike. |
|
Deleted
Deleted Member
Posts: 0
|
Post by Deleted on Jun 18, 2015 20:18:28 GMT
Hi
Great pics .. well done, thanks for taking the time to show us your build, mine will follow shortly. Also many thanks for the ripple eater boards , and I was just about to ask about the theory behind it all when you just posted the article .. many thanks for this, greatly appreciated.
To drum up enthusiasm with other constructors I thought we could have a little friendly competition with a independent judge of sorts .. what do you think ??
anyway a great site with some great banter .. love it !!!
|
|
|
|
Post by PinkFloyd on Jun 18, 2015 20:28:37 GMT
We can let the best ears in the business "evaluate" the SQ Nick...... as I said, initially, you haven't got a clue who you are betting "pork pies" with Over to you......... Pinkie. |
|
|
|
Post by PinkFloyd on Jun 18, 2015 20:44:07 GMT
Hi Great pics .. well done, thanks for taking the time to show us your build, mine will follow shortly. Also many thanks for the ripple eater boards , and I was just about to ask about the theory behind it all when you just posted the article .. many thanks for this, greatly appreciated. To drum up enthusiasm with other constructors I thought we could have a little friendly competition with a independent judge of sorts .. what do you think ?? anyway a great site with some great banter .. love it !!! Hi Nick, What I have shown, so far, is the stock build (as it should have been)..... the mods will kick in in September (at the earliest)........ Perfection takes time. Mike. |
|
Deleted
Deleted Member
Posts: 0
|
Post by Deleted on Jun 19, 2015 10:06:12 GMT
The attached JLH schematic may be of assistance. The updated version hasn't been added to Greg's site yet. Alex

|
|
|
|
Post by PinkFloyd on Jun 19, 2015 20:09:26 GMT
Cheers for that Alex ^  Nick, I fitted the carbon composite resistors this afternoon so just a case of fitting the matched quad TIP41 and heatsinks now:  The input tracks on the board are pretty crazy if you ask me and will be much better being bypassed with wire...... that way you can lose SIX links and TWELVE solder joins..... the culprits are marked with a red X: 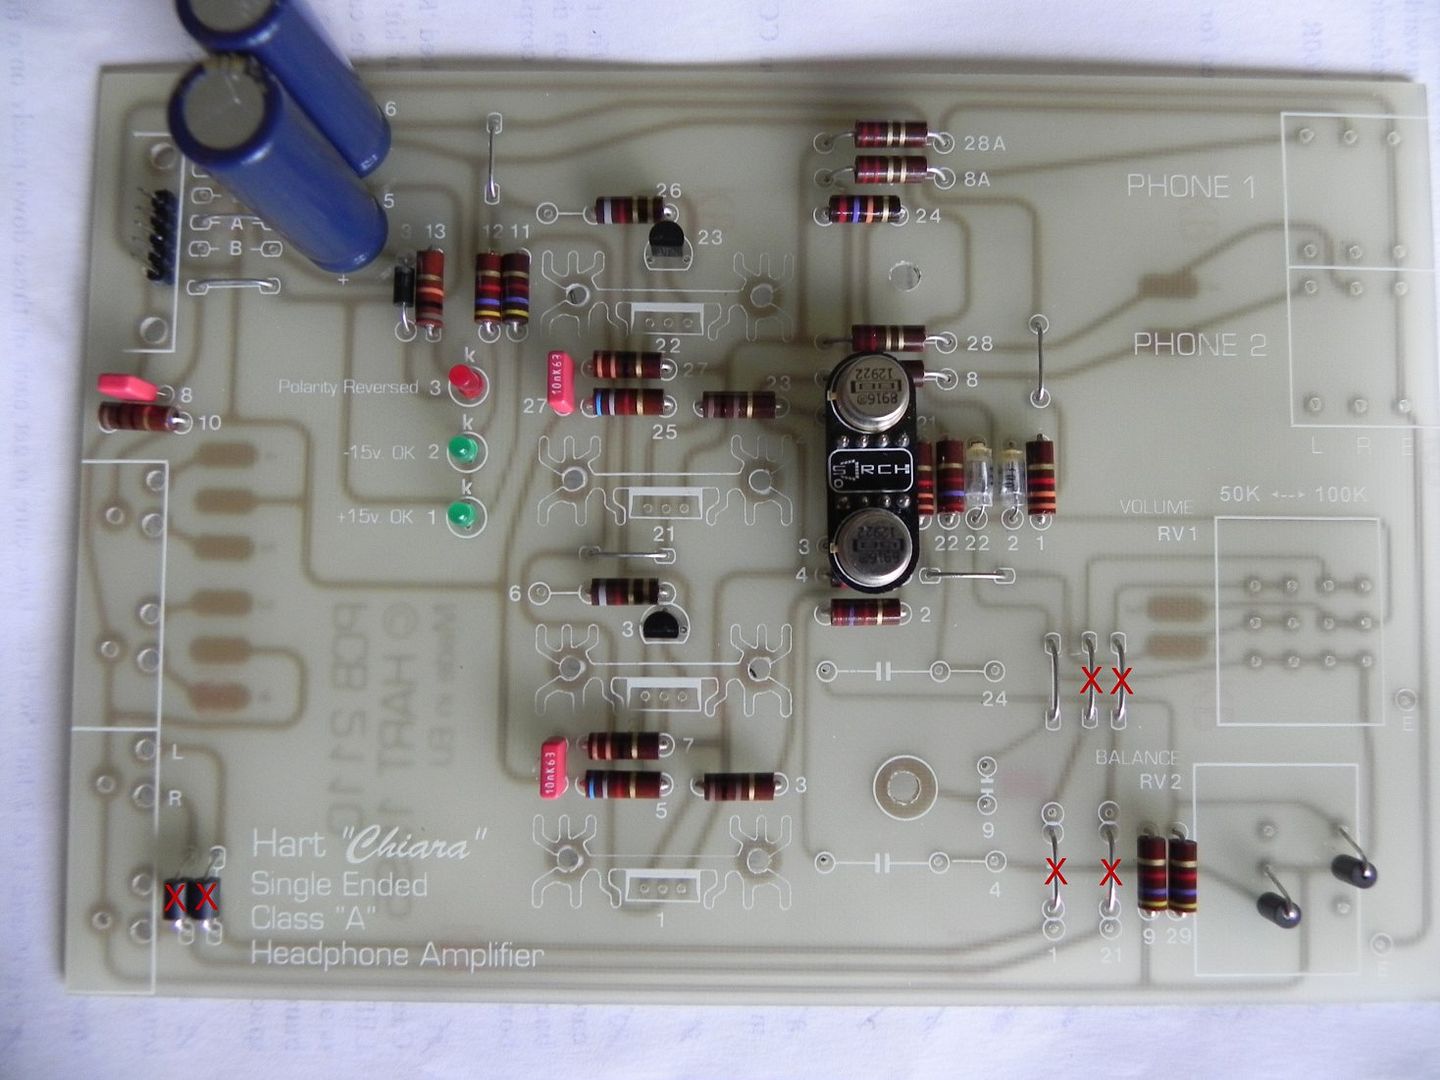 I have never been one of those who are too bothered about wire links and solder joins but SIX links on the input is totally unnecessary when you can run wire from the input straight to the pot. I've drawn a "rough" sketch and I would tend to route the wires under the board. I know, it's not rocket science BUT to some people it may not be obvious that those six links are not required and a straight forward input to pot wire is all that's needed: 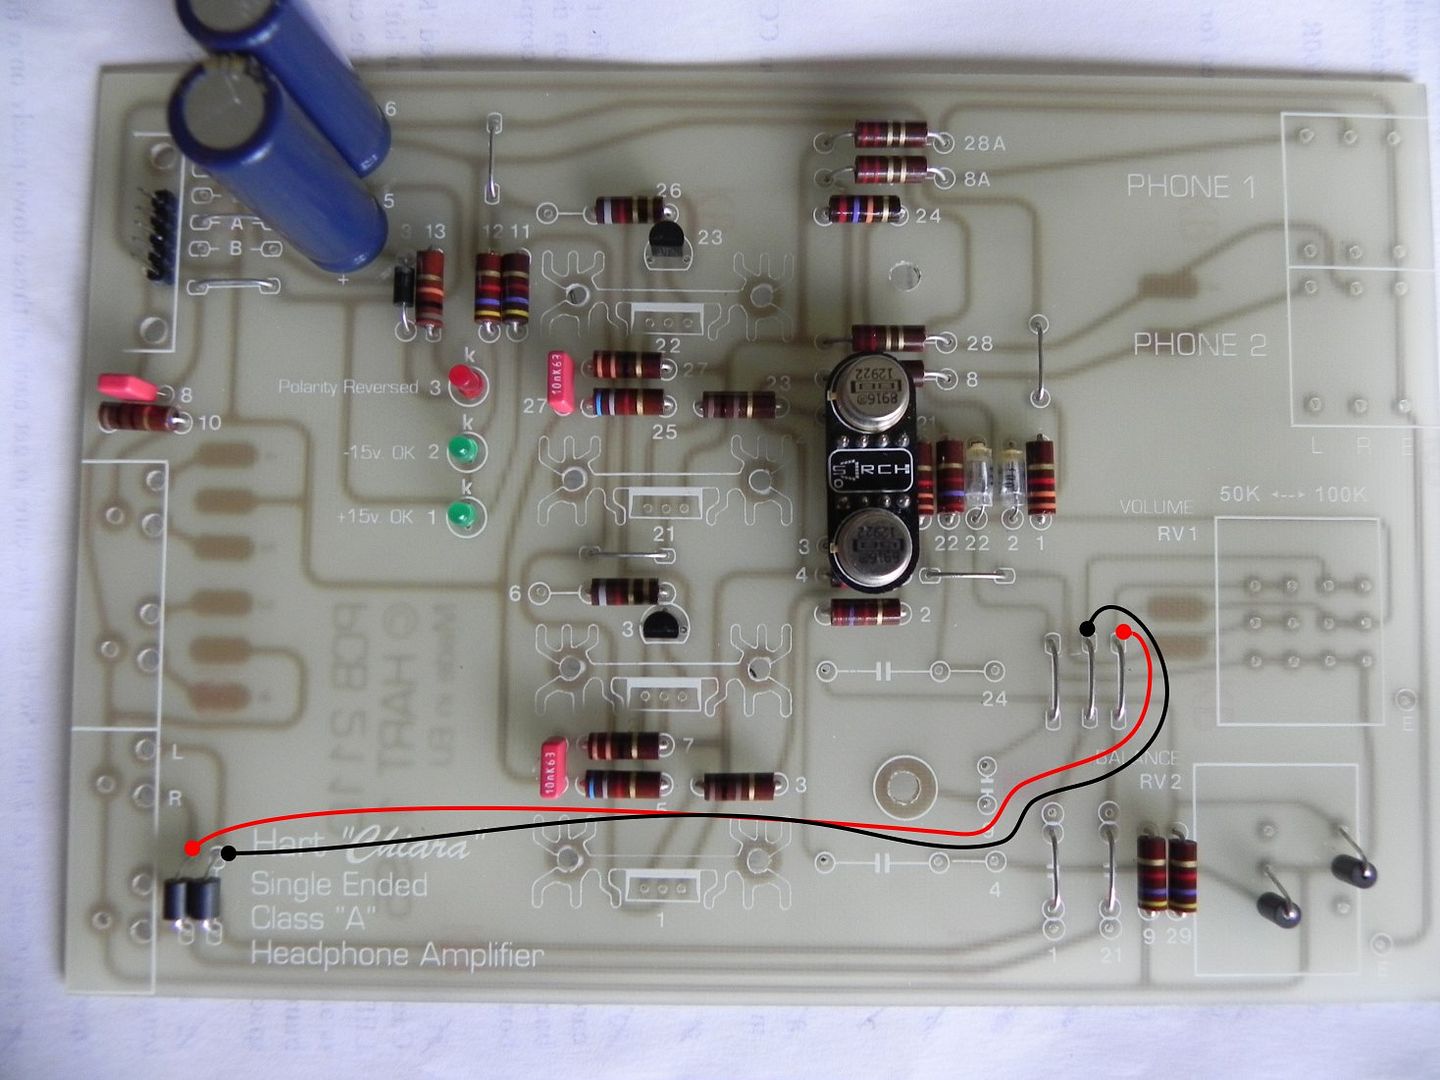 The way I'll do it is to go straight from the RCA pad to the pot pad, that will bypass ALL of the trace and will mean there are only two solder joins (per side). I'll cut the original trace so the signal only runs through the wire...... I've got some nice solid silver PTFE coated wire which will come in handy for this job, 50 metres of the stuff so if you want a metre just let me know. It was as cheap as chips a good few years back and is probably now regarded as some type of "guru" magic cable with a price tag of £100 per inch..... these audio "boutiques" really do take the piss don't they? Looking forward to firing the amp up and listening to it with the carbon composite resistors...... they've got a beautiful euphonic / mellifluous signature but are also organic and raw when the occasion dictates. I have never used them in a JLH Chiara so this is a totally new hearing curve for me but I am 97.4% confident that they will perform well in the JLH amp. What's all that pish in the manual regarding the 2r2 resistors? It says they can be 0.5W or 2 watt types and have to be "wirewound"..... erm, they are inline with the headphone socket / signal path and "wirewound" are the worst you could possibly ever choose to employ in this area! The design is inherently flawed and the PCB layout is a fekkin' joke BUT it sure is good fun getting down and dirty once again Nick....... what's your take on Bill Wilson's mods? rockgrotto.proboards.com/thread/10081/chiara-modifications-increase-power-outputTime to shape up or ship out matey If this party is going to get started it requires input from all involved Mike. |
|
|
|
Post by PinkFloyd on Jun 19, 2015 20:41:43 GMT
Get straight in there / go direct..... no faffing about... input to pot in a straight feed: 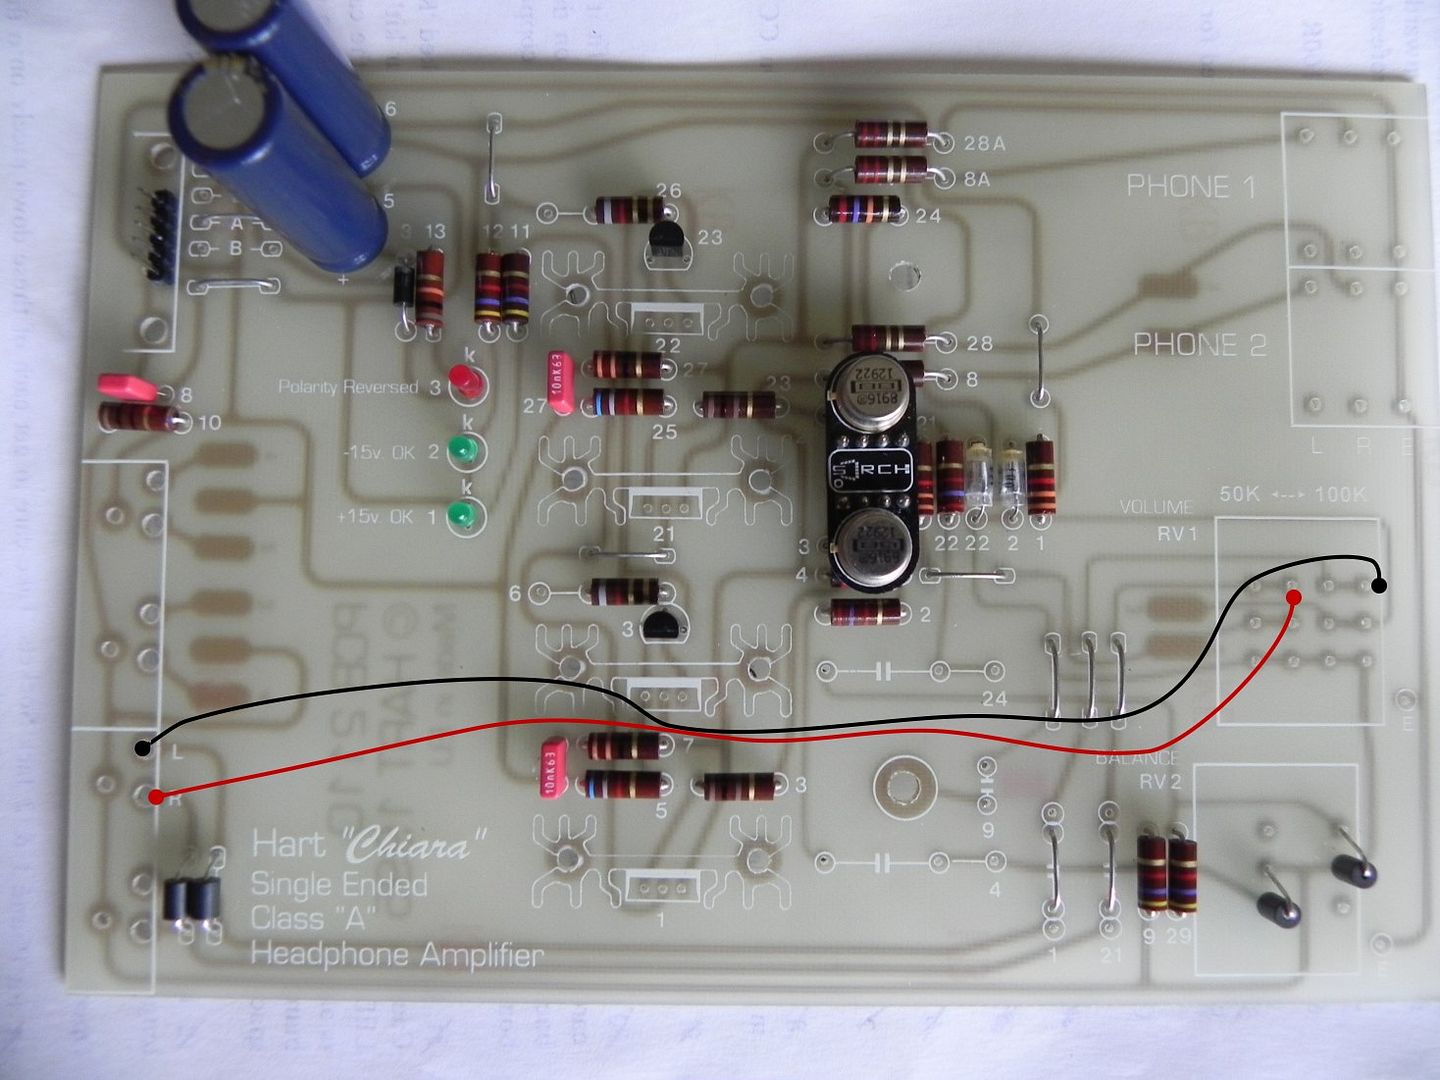 Mike. |
|
|
|
Post by PinkFloyd on Jun 19, 2015 21:45:43 GMT
Where are you Nick? I'm on FIRE and awaiting your input with the hose..... please don't let me down oh godly one bearing the nettles |
|
|
|
Post by PinkFloyd on Jun 19, 2015 21:54:43 GMT
Ready to crank it up a notch Sir?
Pinkie.
|
|
Deleted
Deleted Member
Posts: 0
|
Post by Deleted on Jun 19, 2015 22:12:02 GMT
2 twisted wire pairs perhaps, with the earths connected together at the RHS only ?
You are talking my language Alex!
Mike.
|
|
|
|
Post by PinkFloyd on Jun 19, 2015 22:56:40 GMT
2 twisted wire pairs perhaps, with the earths connected together at the RHS only ? You are talking my language Alex! Mike. Spot on! |
|
Deleted
Deleted Member
Posts: 0
|
Post by Deleted on Jun 20, 2015 10:51:49 GMT
|
|
Deleted
Deleted Member
Posts: 0
|
Post by Deleted on Jun 20, 2015 16:55:56 GMT
Hi every one
what a great neat and tidy build well done, great quality photos as well. The regulator boards turned up today .. many many thanks for this, really pleased
In my workshop currently completing a 2nd HIFI PC build and trying to complete a 90w mono block valve amplifier. I can share some pics if you are interested ??
But dont worry the might headphone amp is brewing .. just wanted to see any ideas I could pinch 1st ... great thread everyone and most helpful members, hopfully others will join soon. I may burn the mid night oil tonight
|
|
|
|
Post by PinkFloyd on Jun 20, 2015 19:10:35 GMT
|
|
|
|
Post by PinkFloyd on Jun 20, 2015 20:20:17 GMT
I fitted a pair of 4uF Ansar "supersound" polyprop caps as I really liked their sonic invisibility in the last Chiara. The Evox / Rifa types were ok but they seemed to add a bit of their own flavour to the sound so best to stick with something you know is right for the job. It's pretty well known that quite a lot of these "boutique" polyprops are Ansar caps that have been relabelled so there's no point forking out tens of pound per cap when you can get the Ansar ones for £5.40 each. When I lived in London my local parts supplier was Cricklewood Electronics and the Ansar caps were the ONLY polyprop they used to supply as they believed it to be the best bang for the buck...... that was back in the 1980's and they are still supplying them to this day: www.cricklewoodelectronics.com/CPW4U0.html Wilmslow are a fair bit cheaper but I prefer Cricklewood as they're a great bunch of guys down there www.wilmslow-audio.co.uk/40-fd-supersound-capacitor-567-p.aspAs I say, Ansar make most of the capacitors for the "Boutiques" and you can even get them to make a capacitor for you if you buy enough of them Have a read: www.suppression-devices.com/ansar/audio-capacitorstechnical.html Ooooooh!, I feel a £73.99 "Rock Grotto" boutique capacitor will be imminent (only kidding). Talk about spinning things out, I normally put an amp together in a couple of days (max) but (what with one thing or another) this seems to be going at a snail's pace...... I had to go to Wick today and took a detour on the way back to John O' Groats for a burger and when I got home it was straight out into the garden to mow that BITCH of a lawn (which is now infested with fekkin' daisies!).... that lawn, in itself, is a two day bloody job. That's the thing with "summer"....... shit grows and you either chop it down or get buried under it. The Ryobi weed whacker packed in so I bought a Makita, the Makita is a piece of shit so I bought a new carb for the Ryobi..... I am now using the Makita for "light duty" strimming and the Ryobi for serious weed whacking. The Mountfield mower is settling in well, the Tecumseh mower never ceases to amaze me with its sheer POWER..... I've got it totally de-restricted and you literally have to "trot" behind it, it's a beast of a thing..... the little LawnFlite (it came with the house) does between the trees and it's a little workhorse, all credit to it, it's 37 years old. Tomorrow is totally "booked" as I've got quite a few orders to fulfil so I hope to find time to complete the boards next week. A "high" today of 15c so looks like summer may eventually be making its way up to Caithness..... the past couple of months have been absolutely dire with regard to the weather and yesterday was the first day I switched the heating off! Fekkin' middle of June and still freezing "ones" tits off? that's not cricket mate! Hold on..... what was I typing about? Oh yes......... the JLH Chiara headphone amp.... sorry for going off topic, I have a tendency to do that....... that burger (by the way) was damned awful, it was one of those "generic" types that you get at fun fairs and to call it the "Groat Burger" is doing nothing for the culinary reputation of the far north of Scotland. There was a yank who "loudly" ordered a "Groat Burger" and loudly exclaimed "hold the onions!"...... poor bastard, he should have shouted out "hold the fekkin' lot, I'm not eating this crap asshole!" John O' Groats is an extremely strange place with the main eatery being a burger van..... it's usually NOT a sign of quality if you're buying your dinner from a cafe on wheels Anyhoo...... oh yes, the other highlight of the day......... drum roll if you please (what a sad life I lead ): 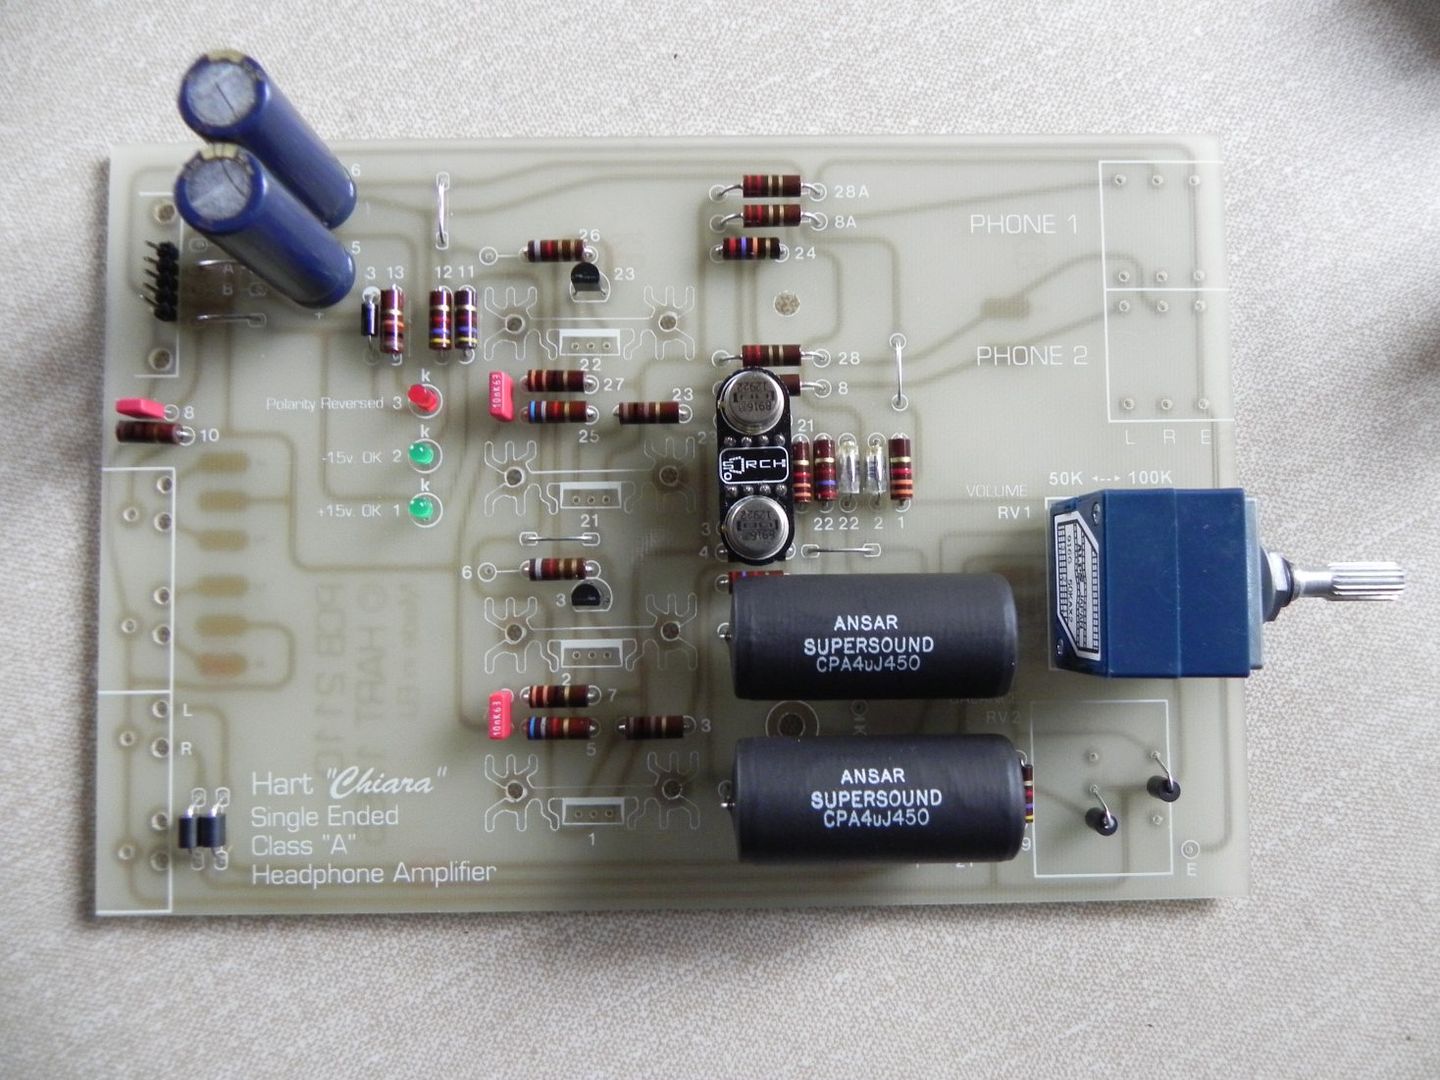  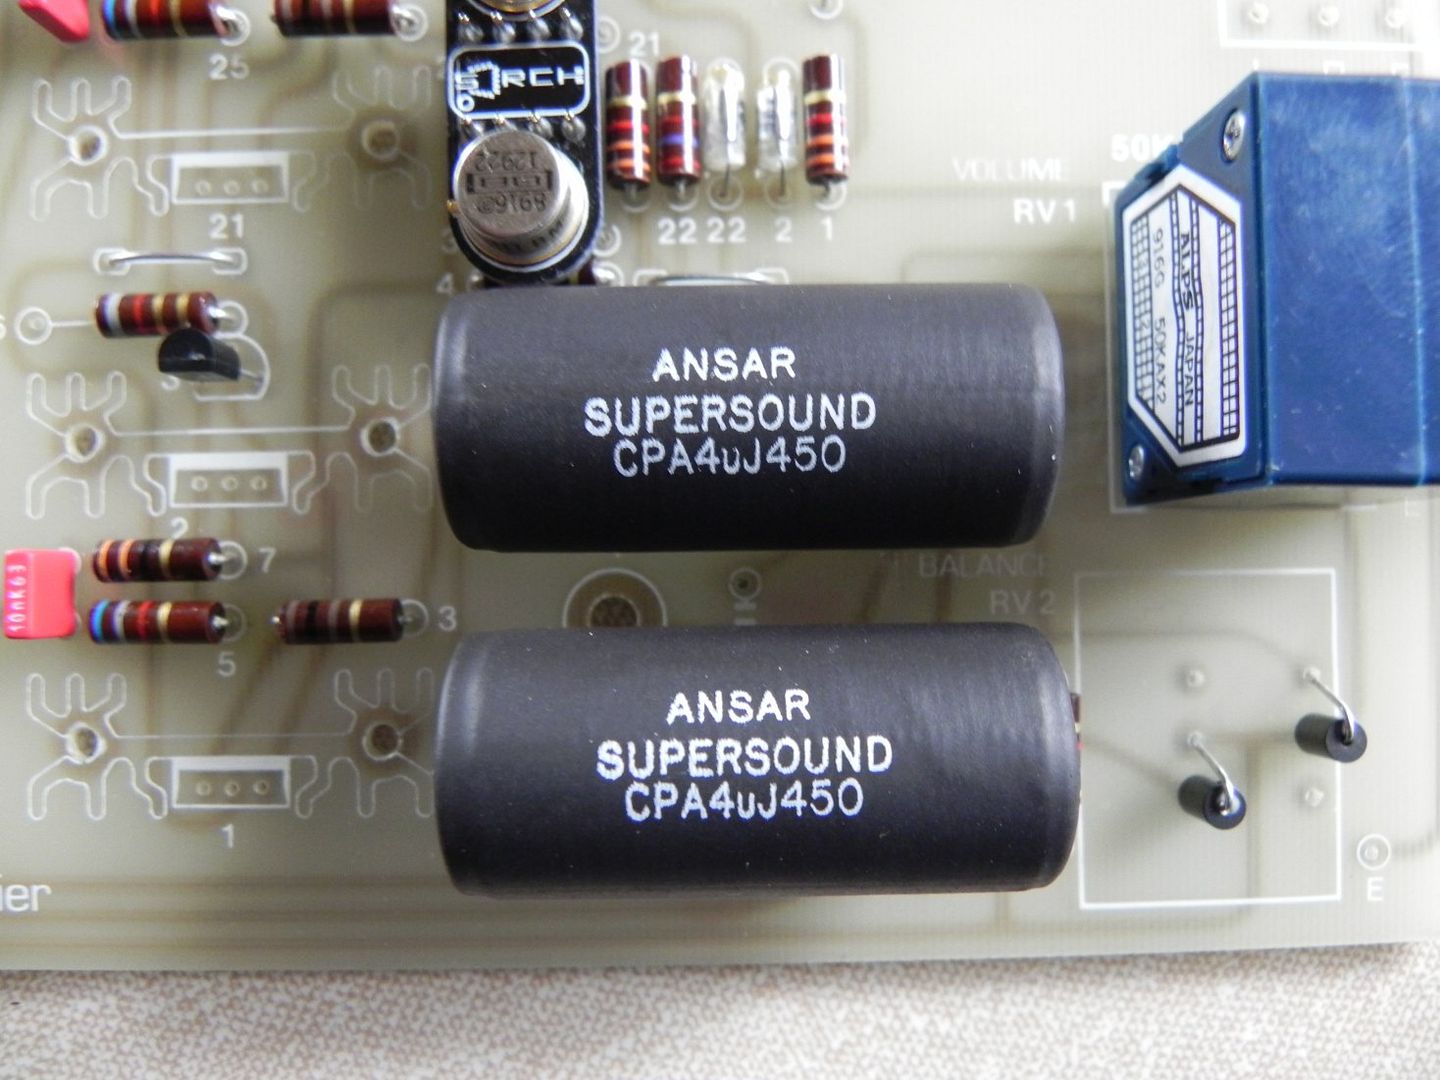 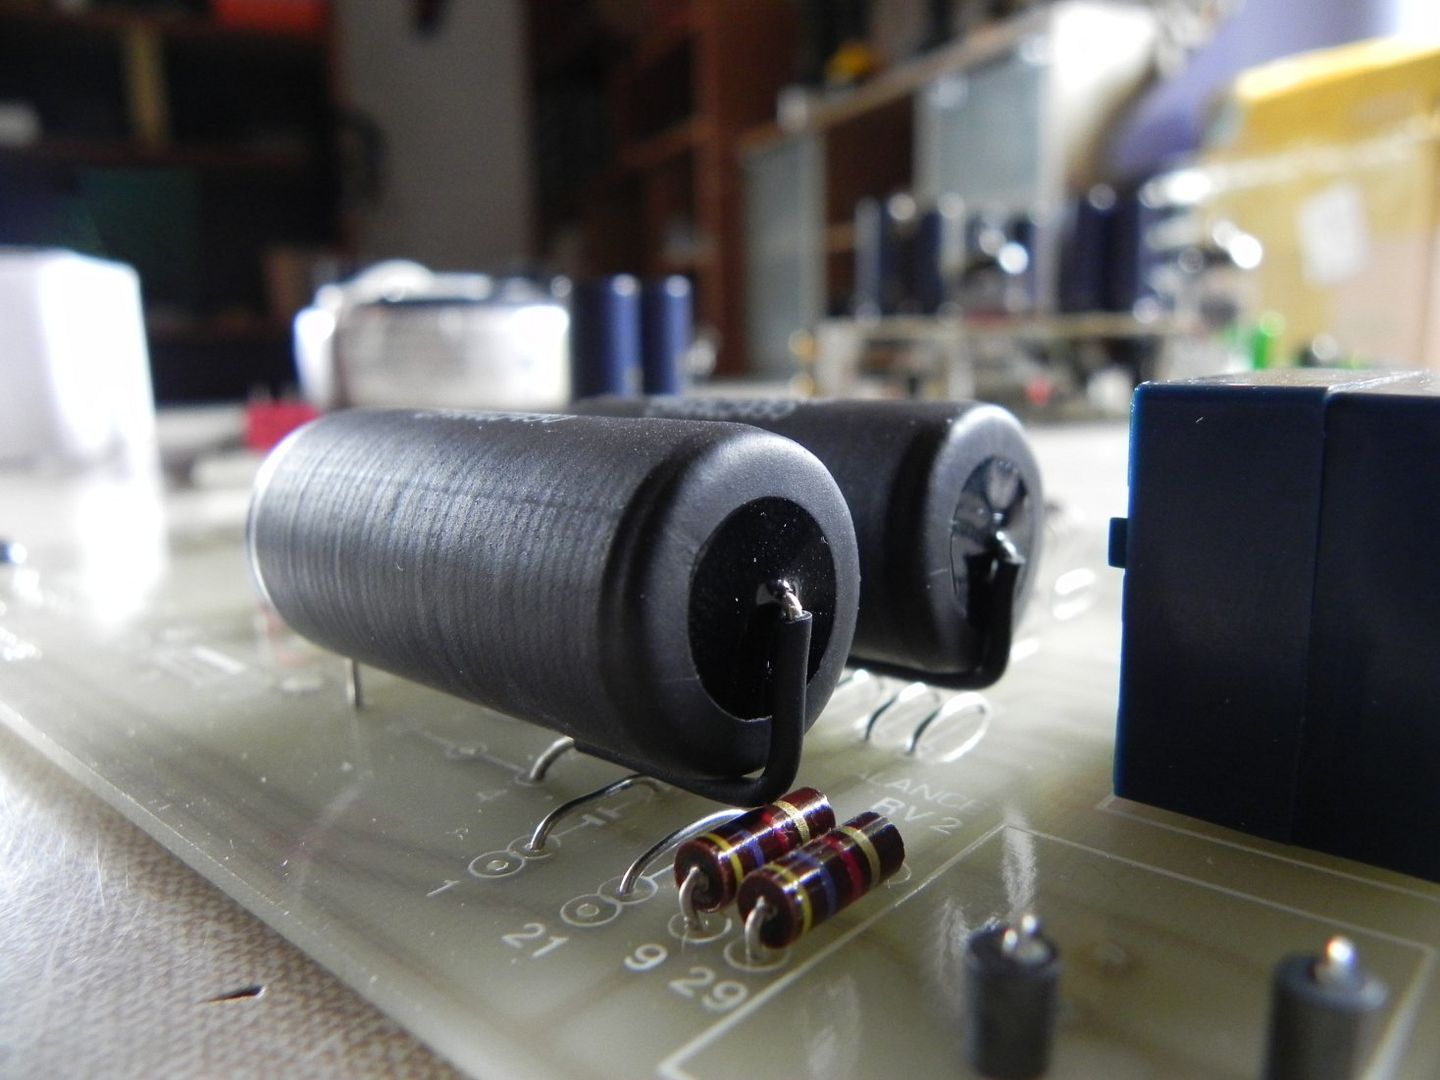 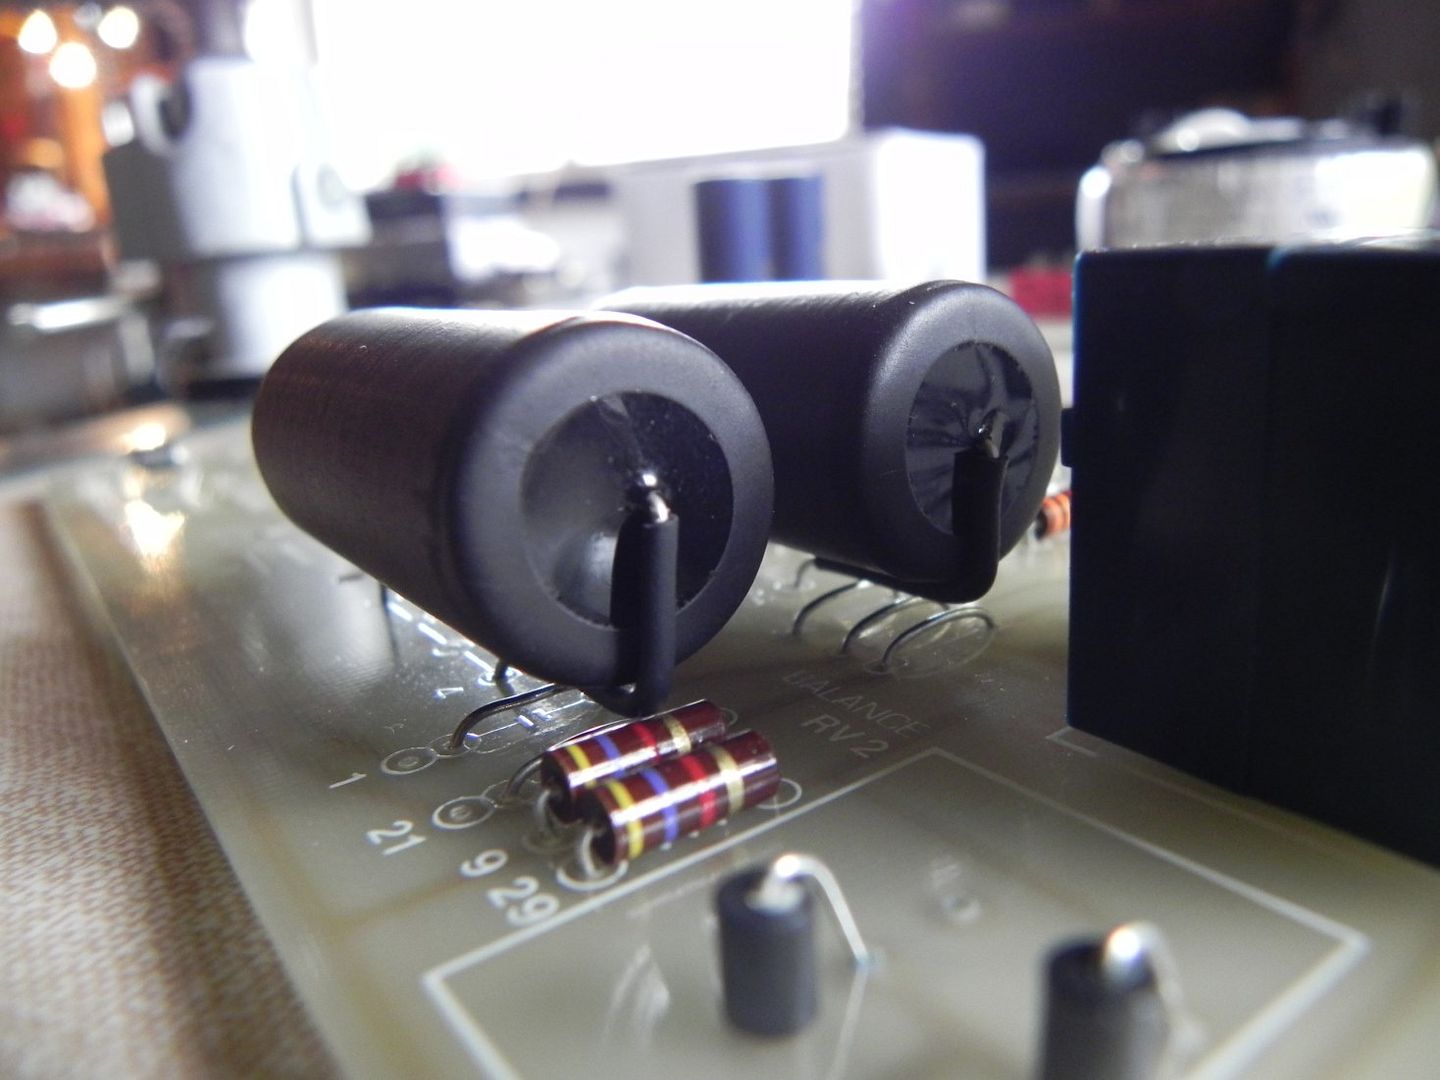 |
|
|
|
Post by PinkFloyd on Jun 20, 2015 20:31:49 GMT
The ALPS RK27 is only in situ for illustrative purposes...... I'll be utilising my own "hand made" stepped attenuator in the final build.
More to follow.......
|
|
|
|
Post by PinkFloyd on Jun 20, 2015 20:36:23 GMT
PS: I mounted C9 under the board...... gives the polyprops good clearance for a nice fit |
|
|
|
Post by PinkFloyd on Jun 20, 2015 21:03:10 GMT
Hi James. I thought you'd done a runner mate Thank you. You did me a big favour by getting my juices flowing again, the Chiara was the first headphone amp I made all those years ago so thank you sir " VERY interested Nick but start a separate thread...... I'm sure there will be a lot of interest. You think I'm going to show you the card up my sleeve at the first visit? Jesus man......... you'll have to become my bitch before I divulge the "platinum" Chiara plans This is the way it used to be here Nick but imagine it times by 100 back in the day......... I loved it and I dedicated all of my spare time to it BUT it became a questions and answers joint with randoms asking the questions and the few stalwarts that were manning the joint expected to ANSWER within an hour......... Not what this place is about and the main reason I went onto the back burner. You are a breath of fresh air..... you're a contributor, not a "taker"..... a forum can only work if there's give and take. Your opinions, your outlook on life, your ongoing projects etc are ALL welcomed here. All the best, Mike. Don't ask.... just say it. |
|
Deleted
Deleted Member
Posts: 0
|
Post by Deleted on Jun 20, 2015 22:20:08 GMT
Hi Mike I found it by accident. There is a pile of my stuff there among it too. I thought you would find it interesting to see some of that again.
Regards Alex
|
|
Deleted
Deleted Member
Posts: 0
|
Post by Deleted on Jun 20, 2015 23:18:46 GMT
Mike
many thanks for the most kind words .. I will get some photos up as soon as possible
all the best
Nick
|
|
|
|
Post by PinkFloyd on Jun 21, 2015 12:53:06 GMT
|
|
Deleted
Deleted Member
Posts: 0
|
Post by Deleted on Jun 21, 2015 15:38:37 GMT
Hi Yes loads of members making threads .. I suppose there is only a few of us making stuff these days .. which is a shame Nick |
|
|
|
Post by PinkFloyd on Jun 21, 2015 18:38:16 GMT
Hi Guys, Would you have a quick look to double check that the caps are connected correctly........ I'm a bit of an idiot and am not too sure what I'm doing at times I wanted to get more capacitance on the PSU board but I didn't want it to be funky capacitance, all over the shop, so I came up with this little add on board: 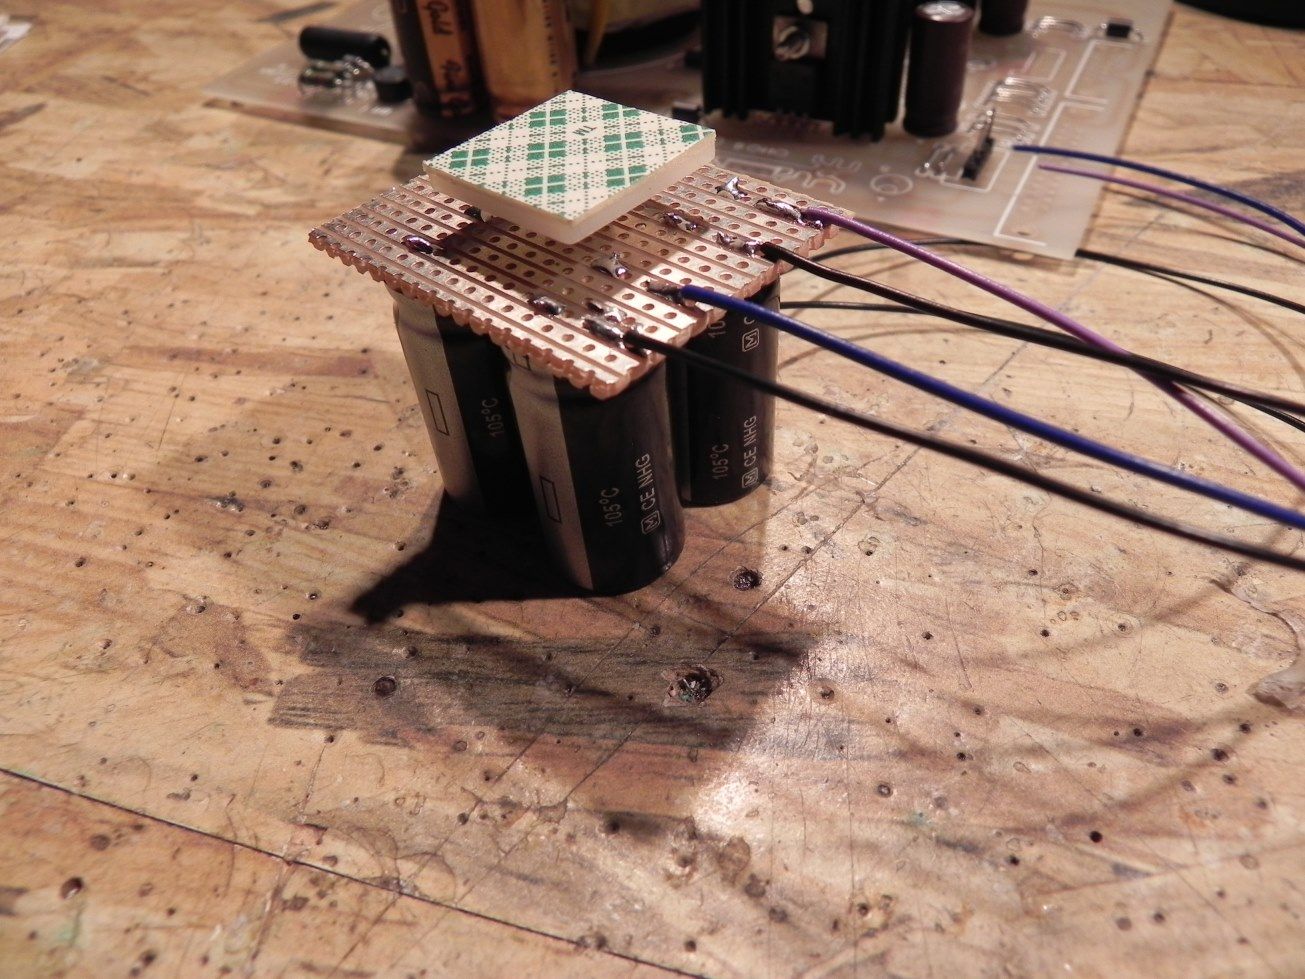 2 x 3300uF capacitors in parallel per side giving a total of 6,600uF per side. The wires from the board go through the spare holes where the optional heatsink would have been fitted:  The black wire on both sides is the negative and the other two are the positive wires...... here's how I hooked the add on board up, what do you think?  It integrates pretty well and seemed the logical place to fit it but if you guys can see any problems with this then comments most welcome: 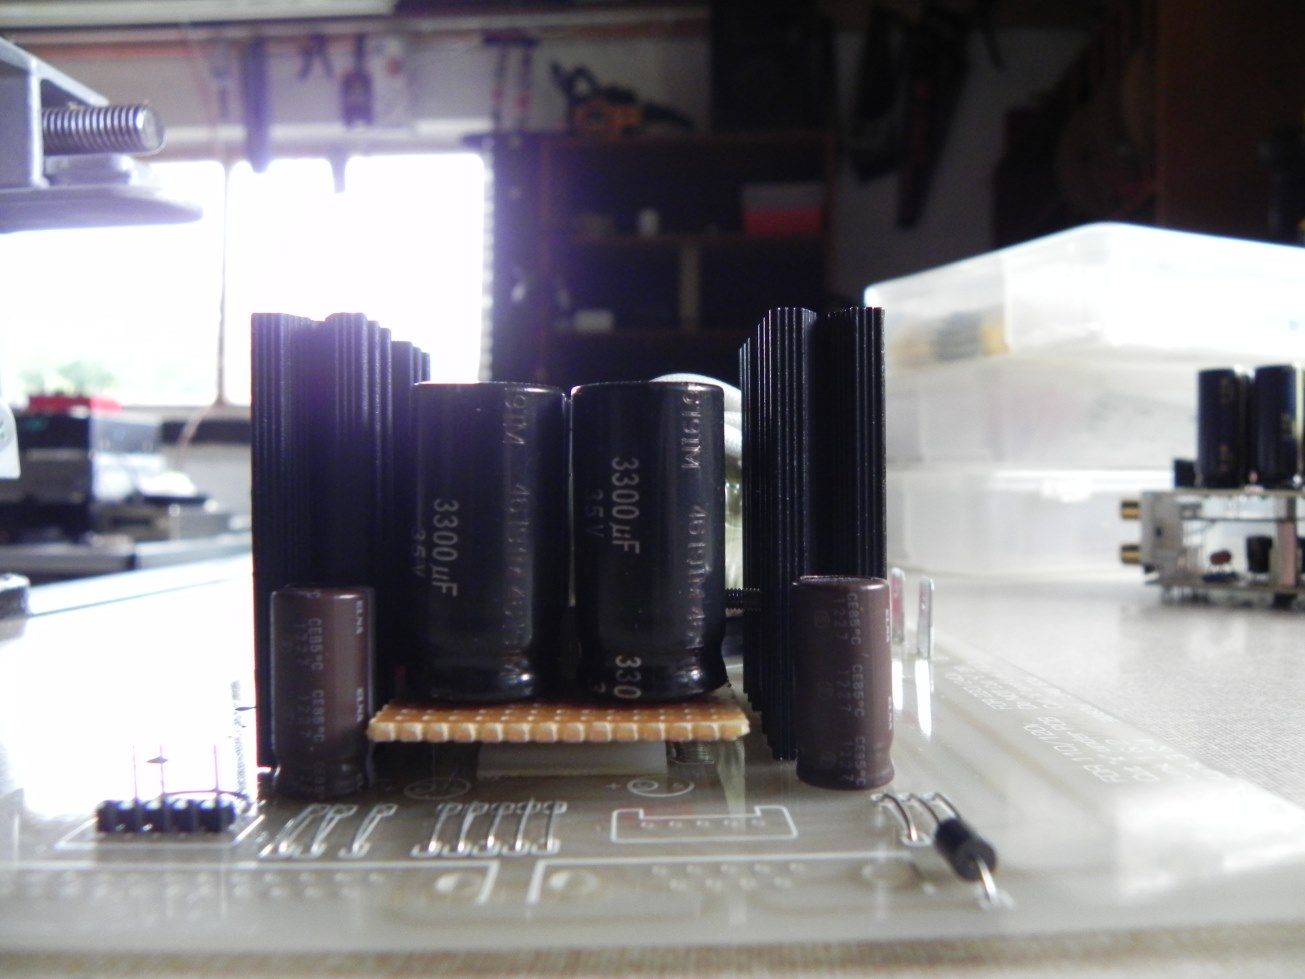 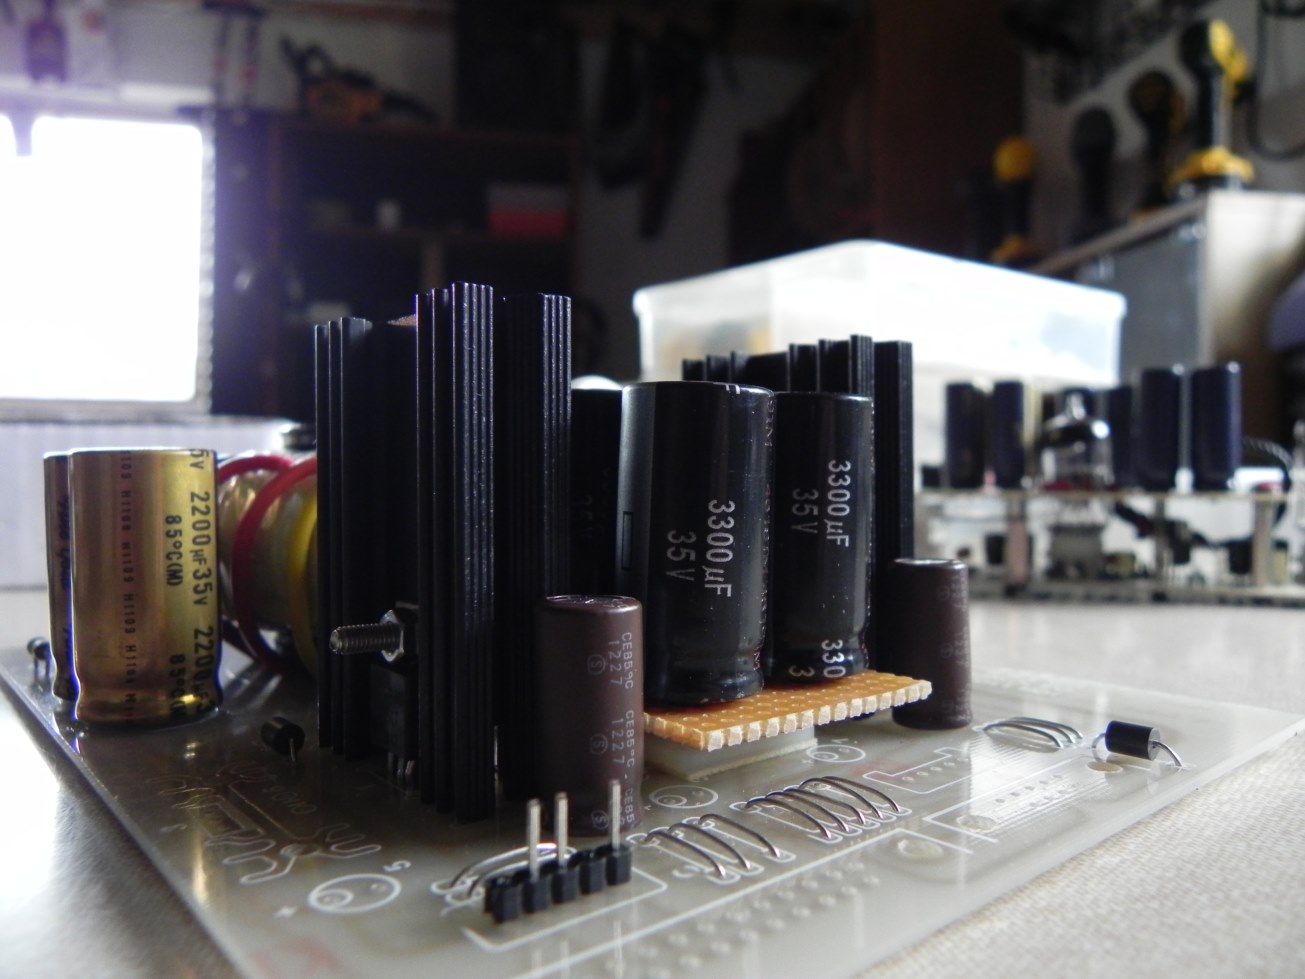 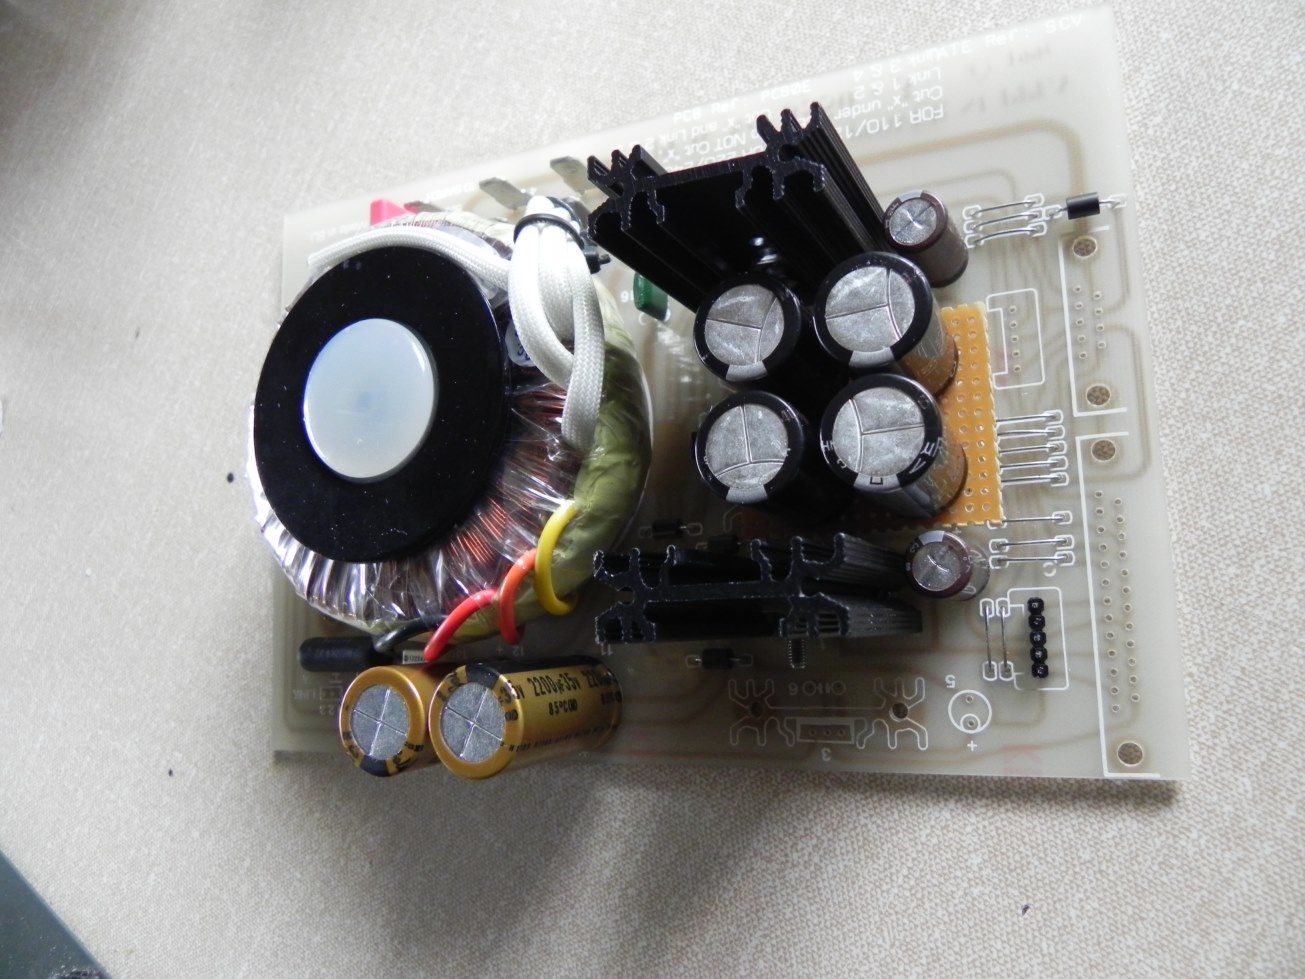 |
|


